
Skip to content
IMH

Best Picks

The Best Sanders for Furniture, Matched to the Job You Are Actually Doing

Most furniture projects fail at the sanding stage, not the painting stage. Here is which machine each job needs, which one almost everybody should buy first, and when the right answer is no machine at all.

By Catherine Vizcaino · Home-renovation pro & founder

Updated August 2026

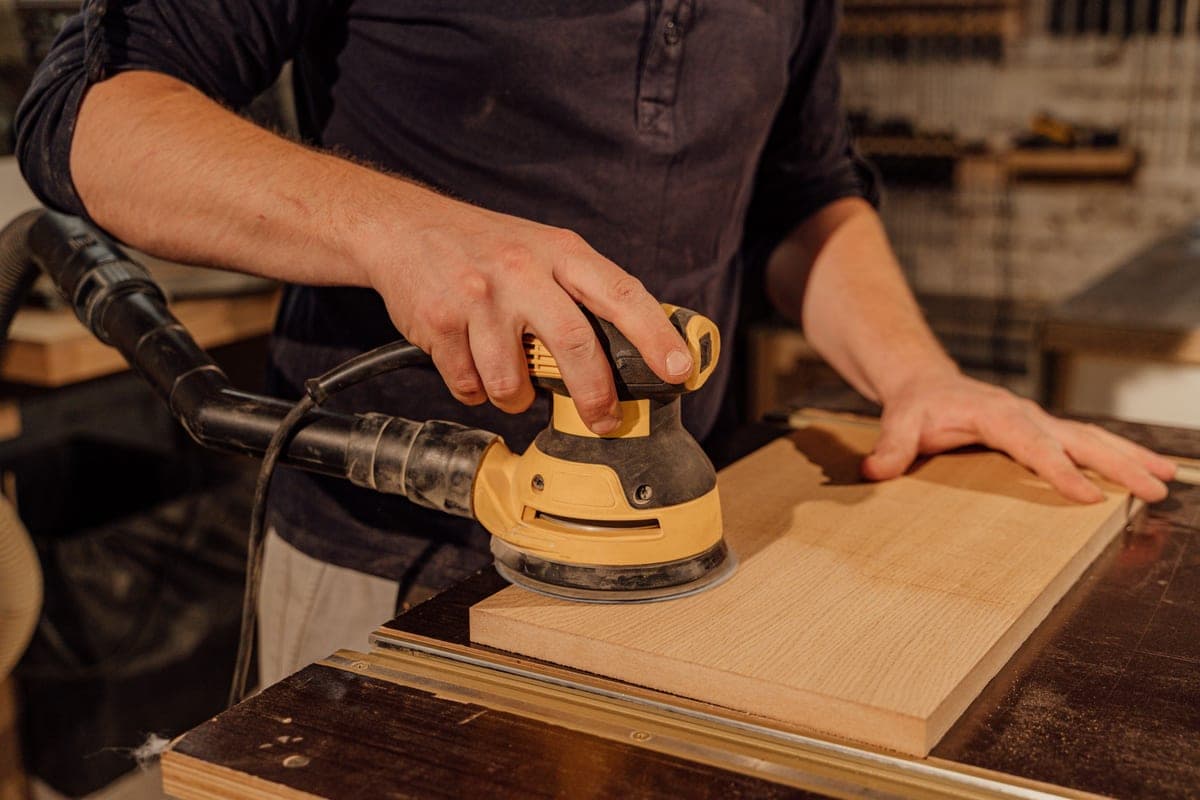
Sanding a wood surface while refinishing furniture

As an Amazon Associate, I Heart My Home earns from qualifying purchases. It never changes your price or our picks. Learn more.

Sanding is the part of a furniture project nobody photographs and everybody underestimates. It is also where the outcome is decided. Paint, stain, and topcoat only reveal what the surface underneath was already doing — a swirl mark you could barely see on bare wood becomes a permanent feature under a coat of satin enamel, and a finish that was not scuffed properly lets go of the paint in sheets about eight months later. Getting the sanding right is most of the job, and it is very doable at home.

The catch is that “a sander” is not one tool. The machine that flattens a dresser top is the wrong shape for the slats on a chair back, and neither of them can touch a turned leg. That is why this page is organized by the job rather than by amperage. Before the picks, here is the order I actually judge these in when someone describes a project to me.

  • What shape is the surface? Broad flat panels — tabletops, dresser sides, drawer fronts — want a round random orbital. Square inside corners and edges want a sheet sander, because a round pad physically cannot reach into a corner. Slats, louvers, and carving want a pointed detail sander. Turned legs and curved rails want a hand block and nothing else. Most pieces of furniture contain at least two of those.
  • Are you removing a finish or just scuffing it? These are completely different amounts of work. Scuffing an intact finish so primer can grip is fifteen minutes with a fine abrasive and barely stresses any machine. Taking an old varnish back to bare wood is an afternoon, generates real dust, and is the only job here that justifies buying for power.
  • Is it solid wood or veneer? This is the question that saves pieces. A veneer is a paper-thin layer of real wood over a substrate, and a random orbital left in one spot will go through it in seconds — a mistake that is not fixable, only hidden. Most affordable furniture from the last forty years is veneered. When in doubt, sand less and by hand.
  • Where will the dust go? Every sander here throws fine dust. Onboard dust boxes catch a useful fraction and let a lot past; a sander connected to a vacuum catches most of it. That difference decides whether the job can happen in a spare bedroom or has to happen in a garage, and it matters far more if the piece might carry old lead paint.
  • Which part are you actually buying? The abrasive does the cutting; the machine only holds it and moves it. Fresh discs on a cheap sander beat worn discs on an expensive one, every time. Plan on spending real money on paper and less than you think on the tool.

The eight buys below cover that spread: a variable-speed random orbital that is the right first machine for most people, the cheapest version worth owning, a cordless for short bursts, a detail sander for the places a round pad cannot go, a sheet sander for flat panels and square corners, a hand block for curves, the discs that do the actual work, and the respirator that is not optional. If you have not settled on a finish yet, read the furniture paint guide first — the paint you choose changes how much sanding you need, and some of them need almost none. If the plan is to spray rather than brush, the paint sprayer guide picks up where this page ends.

One honesty note before you shop. I renovate homes for a living, so I have sanded a great deal of furniture and trim, and I will tell you plainly what I have seen. But I have not bench-tested these specific models side by side and I am not going to pretend otherwise: every feature named below comes from the manufacturer’s own Amazon listing, and where a listing does not state something, this page tells you to check rather than guessing on your behalf. Tool prices move constantly, so you will see a live, daily-updated price with a Check price on Amazon button as the fallback when a price is briefly stale. As an Amazon Associate we earn from qualifying purchases at no cost to you — our editorial policy and affiliate disclosure explain exactly how that works.

Quick picks at a glance

#ProductBest forPrice
1
Sanding a wood surface while refinishing furniture
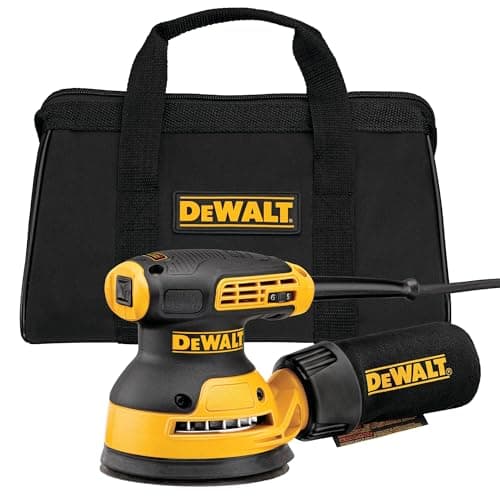
DEWALT Random Orbit Sander, Variable Speed, 5-Inch (DWE6423), Power Source Corded Electric

A 5-inch corded random orbital with variable speed - the one control that matters on furniture, because delicate finishes and veneer need a slower pad than bare pine does.

the first and often only sander most furniture needs
2
A renovation workshop with tools and a workbench
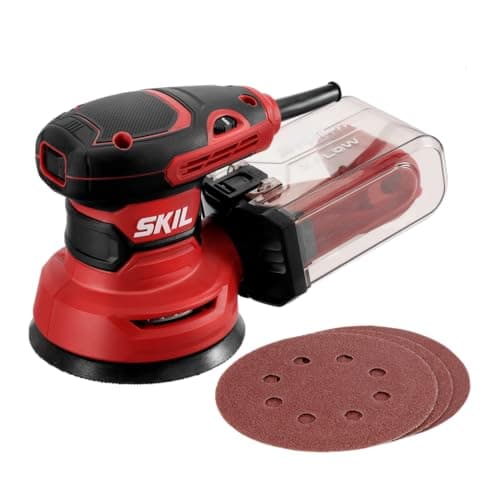
SKIL 5 Inch Random Orbital Sander with Cyclonic Dust Box and 3pc Sanding Sheet - SR211601

The cheapest random orbital here that still comes from a name with a real tool history, and it ships with a cyclonic dust box rather than a limp bag.

one dresser, on a budget, with no plans beyond it
3
A wood dresser styled in a bedroom
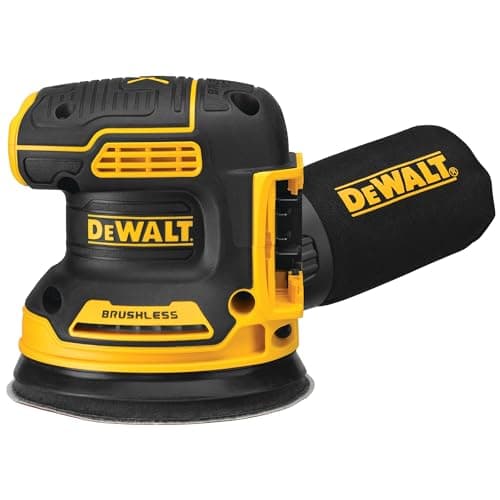
DEWALT 20V MAX Orbital Sander, Tool Only (DCW210B)

A cordless 5-inch orbital for anyone already inside the DEWALT 20V system - sold as a bare tool, which is the whole calculation.

short bursts, no outlet, and people who already own the batteries
4
A vintage-styled room with antique furniture and warm accents
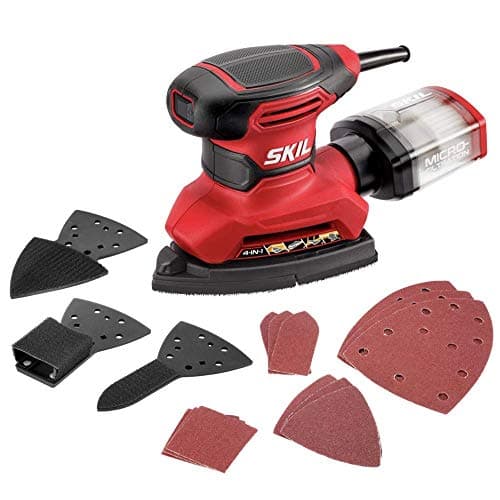
SKIL Corded Multi-Function Detail Sander with Micro-Filter Dust Box 3 Additional Attachments and 12pc Sanding Sheet - SR232301

A pointed detail sander that ships with three extra attachments, which is what makes it useful on the shapes that actual furniture is full of.

slats, louvers, carving, and square inside corners
5
A styled wood coffee table in a living room
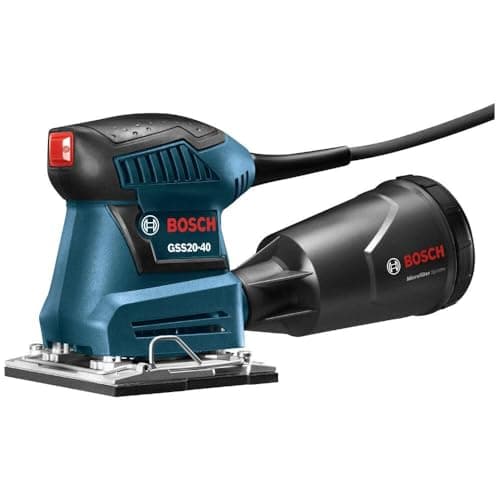
BOSCH GSS20-40 Orbital Finishing Sander 1/4-Sheet, 2 Amp, 12000 OPM with Dust Collector

A quarter-sheet finishing sander - the square-pad tool that sands flush into corners and along edges, and the gentlest powered option for a final pass.

flat panels, square edges, and the last pass before finish
6
A rustic room with natural wood and warm textures
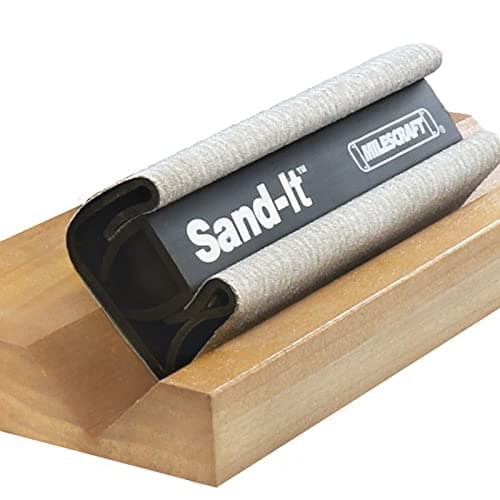
Milescraft 1622 Sand-It Multi-Surface Sanding Block

A shaped hand block for the parts of furniture no machine fits - the listing names flat, concave, convex, and round surfaces, and it takes any quarter sheet of sandpaper.

turned legs, curves, and anything with a profile
7
Painting a dresser with a brush during a DIY project
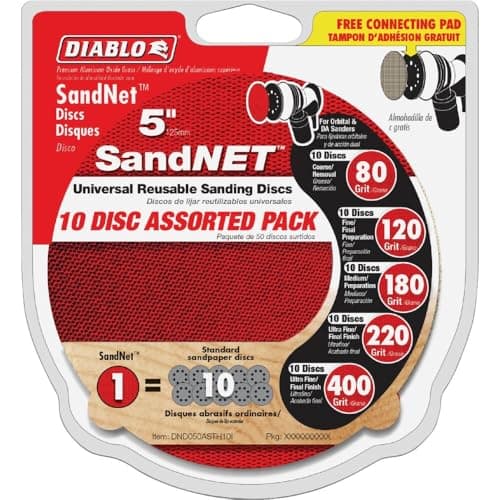
Freud Diablo SandNet Reusable Assorted Sanding Discs with Connection Pad for Wood, Metal and Plastics - 5 Inch, Multi-Grade Grit, Ceramic Blend, 10-Pack

Assorted-grit 5-inch net-style discs in a ceramic blend, shipped with their own connection pad - the abrasive upgrade that makes any of the machines above perform better.

the part of the job that actually does the cutting
8
Using a paint sprayer on furniture in a workshop
3M 8511 Paint Sanding N95 Cool Flow Valved Respirator, 2-Pack

The disposable N95 that 3M lists specifically for paint sanding - the cheapest item here and the only one there is no argument about.

the buy that is not actually optional

Tap any row to jump to the full write-up. Prices open on Amazon in a new tab.

How we chose these picks

Every pick here is chosen the way I’d choose it for a client’s home: real-world durability first, build quality and materials second, and value for the money third. Where I’ve installed or lived with a product on a job, I say so and tell you what I saw. Where a pick is based on research and verified buyer feedback rather than hands-on use, I say that too — I never claim to have tested something I haven’t.

Read our full editorial policy for how we evaluate and update these guides.

1

DEWALT Random Orbit Sander, Variable Speed, 5-Inch (DWE6423), Power Source Corded Electric

DEWALT · Best for the first and often only sander most furniture needs
Sanding a wood surface while refinishing furniture

A 5-inch corded random orbital with variable speed - the one control that matters on furniture, because delicate finishes and veneer need a slower pad than bare pine does.

If I could give someone exactly one sander for furniture work, this is the shape and this is the feature set. Random orbit is the correct motion for anything that will be painted or stained, because the pattern it leaves is effectively invisible under a finish, and 5 inches is the size the entire abrasive market is built around. Variable speed is what pushes it ahead of the cheaper machines here for furniture specifically. Full speed is what you want when you are taking an old varnish off a solid oak table; it is exactly what you do not want on a veneered nightstand, a thin lacquer, or a final 220-grit pass, where a fast pad burnishes and burns through faster than you can react. Machines with one speed force you to control aggression by feel and patience alone, which works until the moment it does not. This is also the pick that scales beyond furniture into doors, trim, and cabinet boxes, so it earns its shelf space between projects.

$99.0020% off

$79.00 · View on Amazon

#ad · disclosure · Price as of September 19, 2026

Pros

  • Variable speed is stated right in the listing, and it is the feature that separates a furniture sander from a deck sander - you can drop the speed for veneer, thin finishes, and final passes
  • Random orbit motion means the pad spins and oscillates at once, so it does not leave the straight scratch pattern that shows through paint and stain
  • The 5-inch hook-and-loop disc size is the most widely stocked format there is, so replacement abrasive is cheap, everywhere, and available in every grit you will ever need

Cons

  • Corded, so you are working within reach of an outlet and managing a cord across a piece you are trying not to scratch
  • A round 5-inch pad cannot reach into a square inside corner or along a beaded edge - you will still need the detail sander or the hand block further down for those
  • Dust collection on any onboard-bag sander is partial at best; if you care about the dust, plan to connect it to a vacuum and confirm the port fits your hose before you count on it
2

SKIL 5 Inch Random Orbital Sander with Cyclonic Dust Box and 3pc Sanding Sheet - SR211601

SKIL · Best for one dresser, on a budget, with no plans beyond it

A renovation workshop with tools and a workbench

The cheapest random orbital here that still comes from a name with a real tool history, and it ships with a cyclonic dust box rather than a limp bag.

There is a specific and very common buyer here: one piece of furniture, a weekend, and no intention of becoming a woodworker. Spending three figures on a tool for that is bad advice, and buying a nameless marketplace sander for it is worse, because the failure mode is not that it performs badly out of the box - it is that in a year the pad has lost its hooks and nobody sells a replacement. SKIL has been making this category for decades, which means parts and pads remain a real channel. What you give up against the DEWALT above is speed control and a bit of comfort. If your project is a painted piece where the sanding is a scuff rather than a strip, you will not miss either one. If the project is stripping a veneered antique back to bare wood, spend the difference - or do that part by hand.

$37.00 · View on Amazon

#ad · disclosure · Price as of September 19, 2026

Pros

  • The lowest cost of entry on this page to the correct motion for furniture - random orbit, 5-inch pad, standard hook-and-loop discs
  • The cyclonic dust box in the listing is a genuine step up from a fabric bag: it separates dust into a container you can see and empty rather than clogging a cloth filter
  • Ships with sanding sheets, so the tool is usable the day it arrives instead of waiting on a second order

Cons

  • No variable speed named in the listing, so you control aggression with grit choice and patience alone - the exact situation where veneer gets sanded through
  • Budget sanders in this class typically vibrate more through the hand, which is a comfort problem on any session longer than about half an hour
  • Verify which grits are in the included sheet pack before you order; a starter pack is rarely the grit sequence a real refinishing job needs
3

DEWALT 20V MAX Orbital Sander, Tool Only (DCW210B)

DEWALT · Best for short bursts, no outlet, and people who already own the batteries

A wood dresser styled in a bedroom

A cordless 5-inch orbital for anyone already inside the DEWALT 20V system - sold as a bare tool, which is the whole calculation.

This pick is conditional and I would rather say so plainly than let the price tag do the persuading. If you do not already own DEWALT 20V batteries, buying this as a bare tool and then buying a battery and charger separately costs more than the corded machine at the top of this page and does the same work. If you do own them, the calculation flips completely, because cordless removes the friction that stops people from doing the five-minute sanding jobs properly - the scuff before primer, the quick pass between coats, the corner you noticed after the piece was already back in the room. Those are the jobs that get skipped when it means finding an extension cord, and skipping them is exactly how finishes fail. Read the listing carefully before ordering: bare-tool and kit versions of DEWALT sanders sit side by side in search results and look nearly identical.

$179.0048% off

$93.74 · View on Amazon

#ad · disclosure · Price as of September 19, 2026

Pros

  • No cord means no cord to drag across a freshly sanded panel, and no hunting for an outlet in a garage, on a patio, or in a room mid-renovation
  • Genuinely better for the short jobs that make up most furniture work: knock the sheen off a set of drawer fronts, feather a repair, scuff a chair before primer
  • Shares batteries with the rest of the DEWALT 20V line, so for anyone already in that system the running cost of adding it is close to nothing

Cons

  • Tool only - no battery and no charger in the box, which makes it a poor value as a first purchase and an easy mistake to make when comparing prices
  • Runtime is finite and sanding is a continuous-draw job, so a long stripping session on one battery is not realistic; plan on a spare or accept the pauses
  • A cordless sander carries its battery in your hand, so it is heavier at the grip than a comparable corded machine over a long session
A vintage-styled room with antique furniture and warm accents

A pointed detail sander that ships with three extra attachments, which is what makes it useful on the shapes that actual furniture is full of.

Look honestly at the furniture you own. Chair backs with slats, louvered cabinet doors, beaded drawer fronts, carved trim on a headboard, the square inside corner where a table apron meets a leg - a round pad cannot touch any of it. That is the gap this fills, and it is the second tool most people should buy rather than the first. What earns this one the place over a plain corner sander is the attachment set, because detail sanding is really several different shape problems and a single triangle only solves one of them. Set your expectations correctly, though: this is a finishing and access tool, not a stripping tool. Ask it to remove an old varnish across a whole chair and you will be there all day. Ask it to prepare the six square inches your random orbital could not reach and it is the only thing that does the job.

$44.0020% off

$35.10 · View on Amazon

#ad · disclosure · Price as of September 19, 2026

Pros

  • The pointed triangular pad reaches into square inside corners and along narrow rails where a 5-inch round pad simply cannot make contact
  • Three additional attachments are named in the listing, which is the difference between a one-shape detail sander and a tool that also handles slats and narrow profiles
  • Small and light enough to use on a chair held in your lap, which is how most spindle-and-slat furniture actually gets worked on

Cons

  • Slow on any large flat area - using it on a tabletop is an exercise in frustration, and it is not a substitute for a random orbital
  • Triangular pads wear fastest at the tip, exactly where you use them most, so you go through the pointed sheets far quicker than the flat ones
  • The oscillating pattern is more likely to leave visible marks than a random orbit, so keep it moving and finish detail areas by hand if the piece will be stained rather than painted
5

BOSCH GSS20-40 Orbital Finishing Sander 1/4-Sheet, 2 Amp, 12000 OPM with Dust Collector

Bosch · Best for flat panels, square edges, and the last pass before finish

A styled wood coffee table in a living room

A quarter-sheet finishing sander - the square-pad tool that sands flush into corners and along edges, and the gentlest powered option for a final pass.

A sheet sander is the tool people buy second and wish they had bought first, because the moment you refinish anything with an edge or a corner you discover what a round pad cannot do. Furniture is full of those: the apron under a tabletop, the inside of a bookcase, the rail where a drawer front meets the frame, the square edge of a shelf. The other reason this belongs on the list is gentleness. Its short, tight orbit removes material slowly, which is a drawback when stripping and a real advantage when you are two coats into a finish and want to knock back the nibs without cutting through anything. Bosch specifying the amperage and orbit rate in the listing is also a small honesty signal in a category where a lot of listings just say powerful. Buy it as the companion to a random orbital rather than as a replacement for one.

$82.9929% off

$59.00 · View on Amazon

#ad · disclosure · Price as of September 19, 2026

Pros

  • The square pad sands right up to an inside corner and flush along an edge, which is geometrically impossible with a round random orbital
  • The listing states 2 amps and 12,000 OPM, and a finishing sander's short orbit is deliberately gentle - the reason it is the safest powered choice on veneer and thin finishes
  • Uses quarter sheets cut from standard sandpaper, so abrasive costs pennies and you are not locked into a proprietary disc size

Cons

  • Slow at removing material by design - this is a finishing tool, and asking it to strip a varnished tabletop will take several times longer than a random orbital
  • The straight orbital motion can leave a faint scratch pattern that a random orbit does not, so it needs a light hand and a final check before staining
  • Loading paper into clamps is fiddlier than slapping on a hook-and-loop disc, and clamp-fed sheets tear at the edges if they are not pulled tight
6

Milescraft 1622 Sand-It Multi-Surface Sanding Block

Milescraft · Best for turned legs, curves, and anything with a profile

A rustic room with natural wood and warm textures

A shaped hand block for the parts of furniture no machine fits - the listing names flat, concave, convex, and round surfaces, and it takes any quarter sheet of sandpaper.

Every roundup of sanders wants to be a roundup of machines, and every real furniture project ends up being finished by hand. Turned legs, curved chair rails, molded edges, the sweep of a headboard - a powered pad either cannot reach them or flattens the profile you were trying to preserve, which is the specific way a machine ruins a piece of furniture that was not otherwise in danger. A shaped block conforms to the curve instead of fighting it. The reason I picked a shaped multi-surface block over a bag of sanding sponges is that a block holds a defined shape under pressure while a sponge collapses and rounds over the crisp lines you want to keep. Sponges are still useful and they are cheap enough to own both. But if you are refinishing anything with a leg on it, do not go into the project with only a machine.

$6.99 · View on Amazon

#ad · disclosure · Price as of September 19, 2026

Pros

  • Covers flat, concave, convex, and round surfaces per the listing, which is a fair description of every curve on a chair, a turned leg, or a molded edge
  • Takes any quarter sheet of standard sandpaper, so it never needs a proprietary refill and any grit you own already fits it
  • It is the cheapest item on this page by a wide margin and the one most likely to be the difference between a piece that looks refinished and one that looks half-refinished

Cons

  • It is hand work - sanding a set of dining chairs with a block is genuinely tiring, and no amount of technique changes that
  • A block cannot enforce a flat surface the way a machine can, so it is for profiles and touch-up rather than for leveling a panel
  • Ships with one grit of paper included, so plan on supplying your own sequence for anything beyond a light scuff
Painting a dresser with a brush during a DIY project

Assorted-grit 5-inch net-style discs in a ceramic blend, shipped with their own connection pad - the abrasive upgrade that makes any of the machines above perform better.

This is on the list to make a point that changes results more than any machine choice on this page: the abrasive is the tool. Sandpaper does not fail visibly. It stops cutting long before it looks worn out, and from that moment on you are pressing harder, generating heat, burnishing the surface instead of cutting it, and concluding the sander is weak. Changing paper twice as often is the single cheapest upgrade in refinishing. The reason I picked a net-style ceramic-blend disc specifically is dust clogging, which is the main way abrasive dies early on furniture work - the finish you are removing is soft, it warms slightly under friction, and it packs into the grit. An abrasive that lets dust pull through its whole face rather than through a ring of holes stays open longer, and one that is designed to be cleaned and reused changes the mental math that keeps people using a dead disc. Buy fewer machines and better paper.

$21.45 · View on Amazon

#ad · disclosure · Price as of September 19, 2026

Pros

  • Assorted grits in one pack, which is exactly what a refinishing job needs - you step through a sequence rather than using one grit for everything
  • Net-style abrasive rather than solid paper with punched holes, a construction designed to pull dust through the whole face of the disc instead of through a few small openings
  • Ships with a connection pad and is described as reusable, so the discs are meant to be cleaned and used again rather than binned the moment they load up

Cons

  • Costs several times what a bulk assortment of plain paper discs costs, which only pays off if you sand enough for the longer life to matter
  • Confirm the connection pad works with your specific sander before ordering - pad sizes and mounting vary, and a five-inch disc is not automatically a five-inch fit
  • A ten-pack across assorted grits means very few discs of any one grit, so a large stripping job will need a top-up in the grit you are leaning on
8

3M 8511 Paint Sanding N95 Cool Flow Valved Respirator, 2-Pack

3M · Best for the buy that is not actually optional

Using a paint sprayer on furniture in a workshop

The disposable N95 that 3M lists specifically for paint sanding - the cheapest item here and the only one there is no argument about.

Sanding a piece of furniture produces exactly the particle size that reaches deepest into your lungs, and the sanding job that feels least dangerous - a quick scuff of an old finish indoors, no visible cloud - is the one people do bare-faced. Old furniture is worse than new wood, because you are not only breathing wood dust, you are breathing whatever finish was on it, applied by somebody who had different ideas about what belongs in a coating. This particular respirator is on this page rather than a generic dust mask because 3M lists it for paint sanding specifically and because the valve is what makes people keep it on. A mask you take off after ten minutes because you cannot breathe comfortably is protecting nobody. This is the last item most people add to the cart and the first one I would tell them to add.

$9.296% off

$8.72 · View on Amazon

#ad · disclosure · Price as of September 19, 2026

Pros

  • N95 rated and named by 3M for paint sanding, which is precisely the exposure furniture refinishing creates
  • The exhalation valve makes it far more tolerable across a long session, and comfort is the entire reason cheap masks end up around people's chins
  • Costs less than a single sheet of good abrasive, which makes the case for owning several rather than rationing one

Cons

  • Disposable - it is consumed by use, and a loaded filter stops doing its job, so it is a repeat purchase rather than a one-time buy
  • A valved respirator protects the wearer only; the valve vents your exhaled air, so it is not the right choice where you need to protect other people
  • No disposable N95 is the correct protection for lead paint abatement, which has its own rules - see the dust section below before you sand anything old

The grit sequence, which matters more than the machine

Sanding is not one action, it is a controlled sequence of scratches, each one finer than the last, until the scratches are too small to see. Skipping a step in that sequence does not save time — the coarse scratch stays there under everything you do afterward, and it appears the moment a finish goes on. Here is how the sequence works for the jobs furniture actually presents.

  • Scuffing an intact finish before paint. One pass with a fine abrasive, roughly 180 to 220 grit, by hand or on a low-speed machine. You are not removing the finish. You are taking the sheen off so primer has something to hold. Two minutes per panel, and it is the difference between paint that stays and paint that peels.
  • Smoothing rough or repaired bare wood. Start around 120, then 150, then 180. Going straight to 180 on rough wood just wears out expensive paper without leveling anything.
  • Stripping an old finish back to bare wood. Start at 80, move to 120, then 180. Eighty grit is aggressive and it is the right tool for varnish that has gone amber and brittle — but it leaves scratches you are then obligated to remove, which is what the following two steps are for.
  • Before stain. Stop at 180, or 220 at the absolute finest. Sanding wood smoother than that closes the grain and the stain goes on blotchy and pale. This is the most common way a well-intentioned extra step makes the result worse.
  • Between coats of finish. 220 or finer, very light pressure, purely to knock down dust nibs and raised grain. You are polishing, not removing. Then wipe every trace of dust off before the next coat.

The rule underneath all of that: never skip more than one grit step at a time, and always check your work under a raking light — a lamp held low and nearly parallel to the surface — before you move up a grit. Scratches that are invisible under overhead light are obvious under a raking one, and finish is the most expensive way to discover them.

Random orbit, sheet, or detail: what the shape of the pad decides

The three powered shapes on this page are not competing versions of the same tool. They solve different geometry, and the reason most furniture needs two of them is that most furniture contains more than one kind of surface.

  • Random orbital spins a round pad while also oscillating it, so no point on the abrasive travels the same path twice. That is what makes the scratch pattern effectively invisible under a finish, and it is the correct default for every flat area on a piece of furniture. What it cannot do is reach a corner: a circle inscribed in a square leaves the corners untouched, and no technique changes that.
  • Sheet or finishing sander moves a square pad in a short, tight orbit. The square gets you flush into corners and along edges, and the short orbit removes material gently — slower for stripping, safer for veneer and for the final pass. The straight motion can leave a faint pattern, so it wants a light hand on anything you plan to stain.
  • Detail sander puts a pointed triangular pad on the end of an oscillating motor so it can get into slats, louvers, carving, and the inside angles a round pad rides over. It is an access tool. It is not a fast way to remove material from anything larger than your hand.
  • Hand block is what you use on curves. A shaped block follows a profile instead of flattening it, which is the whole point on a turned leg or a molded edge. It is also the only correct answer on veneer you are nervous about.

For a first purchase, a variable-speed random orbital plus a hand block covers a surprising share of furniture work. Add the detail sander when the project has slats or carving in it, and the sheet sander when it has square inside corners you cannot reach. If the finishing plan runs to spraying rather than brushing, the paint sprayer roundup covers the other half of that workflow.

Veneer: the mistake that cannot be undone

More furniture is ruined by a sander than saved by one, and it is nearly always the same failure. Veneer is a thin layer of real wood laid over plywood, particleboard, or MDF, and on furniture made in the last several decades it can be very thin indeed. A random orbital held in one place will cut through it in seconds, and once you are through you are looking at the substrate. There is no repair. There is only paint, a patch, or living with it.

You can usually identify veneer without any special knowledge. Look at an edge or a corner: solid wood shows the same grain wrapping around, while veneer shows a fine seam line where the face layer stops and something else begins. Look at the underside or the back panel, which is rarely veneered to the same standard. Look for a grain pattern that repeats identically across a wide panel, which is a sign of a sliced or printed veneer rather than a board. And apply the age test: mass-market furniture with a perfectly flat, wide top is far more likely to be veneered than solid.

If the piece is veneered and you still want to refinish it, the approach changes rather than stops. Use the finest abrasive that will do the job, not the fastest. Keep a powered sander moving constantly and never let it dwell, especially near edges and corners where the veneer is thinnest and the pad is most likely to tip. Use a hand block anywhere you feel uncertain. And consider whether you need to sand at all — a chemical deglosser or a bonding primer prepares a sound existing finish for paint with no abrasion whatsoever, which is often the smarter move on a veneered piece. My furniture paint guide covers which products grip with the least prep.

Dust, and the question to ask before sanding anything old

Sanding indoors is the part people plan for least. Fine dust from a powered sander does not fall neatly into the tool’s dust box; a meaningful share of it goes into the air, stays there long after the tool stops, and lands on every horizontal surface in the room, including the piece you are about to put a finish on. If you have a garage, a covered patio, or a basement, use it. If you do not, take the practical steps: close interior doors, tape plastic over the doorway if the room connects to living space, open a window, and connect the sander to a vacuum rather than relying on its onboard box.

Connecting a sander to a vacuum is the single biggest improvement available here, and it is often just a matter of the right hose adapter. Check the port on any sander you are considering against the hose you own before you assume they fit, because the fit is rarely standard across brands.

Then there is the question that comes before all of that. Homes and furniture predating 1978 can carry lead paint, and dry-sanding lead paint aerosolizes it — genuinely hazardous, especially around children and anyone who is pregnant. Test swabs cost very little and take a minute. If the result is positive, the method changes entirely and a disposable dust mask is not adequate protection; follow the EPA’s lead-safe guidance or hand the job to a certified renovator. This is the one place in furniture refinishing where the correct advice is sometimes to stop.

When the right answer is not to sand at all

A page about sanders should be honest about when you do not need one. There are several common furniture projects where sanding is either unnecessary or actively the wrong move, and knowing them saves money, time, and occasionally a piece worth keeping.

  • Painting over a sound finish with a modern furniture paint. Chalk-style and bonding paints are formulated to grip glossy surfaces with little or no abrasion. Clean the piece properly, degrease it, and read the label — on many projects a scuff by hand is all that is required, and a machine is overkill.
  • Anything with genuine antique value. Original finish and patina are a large part of what an antique is worth, and sanding removes both permanently. If the piece might be valuable, get an opinion before you touch it with abrasive. Cleaning and waxing is reversible; sanding is not.
  • Pieces where the finish is tired rather than failing. A dull, dry, or lightly scratched finish often just needs cleaning and feeding rather than removing — see the furniture polish roundup for what actually helps and what only shines for a week.
  • Veneer you are not confident about. Covered above, and worth repeating: a deglosser or bonding primer carries none of the risk that a powered sander does.
  • Flat-pack and laminate furniture. The surface is usually a printed foil or melamine over particleboard, and there is nothing underneath to reveal. Sanding it does not improve adhesion so much as damage the surface; a bonding primer is the correct approach. The DIY decor guide walks through those projects in more detail.

Where sanding genuinely is required — bare wood, a failing finish, a repair, or anything that will be stained rather than painted — do it properly with the right shape of tool and fresh abrasive. Where it is not, the best sander is the one you did not need to buy.

Frequently asked questions

Do I have to sand furniture before painting it?

Not always, and less often than people assume. If the existing finish is sound and you are using a chalk-style or bonding furniture paint, a thorough clean and a light scuff by hand with a fine abrasive is usually enough for paint to grip. Full sanding becomes necessary when the finish is peeling, flaking, or crazed, when the piece is bare or previously oil-based, or when you plan to stain rather than paint — stain has to reach the wood itself. The step that is never optional is cleaning: furniture carries invisible films of polish, wax, and cooking grease, and paint will not bond over any of them no matter how much you sanded.

What grit sandpaper should I use on furniture?

It depends entirely on the job. Scuffing an intact finish before paint is 180 to 220 with light pressure. Smoothing bare or repaired wood runs 120, then 150, then 180. Stripping an old finish starts at 80 and then steps up through 120 and 180 to remove the scratches the 80 left. Stop at 180 or at most 220 before staining — finer than that closes the grain and stain goes on pale and blotchy. Between coats, 220 or finer with almost no pressure. The rule across all of them: never skip more than one grit step, because the coarse scratch you skipped past stays visible under every coat that follows.

Random orbital or detail sander for furniture?

A random orbital first, for almost everyone. It is the correct motion for anything painted or stained — its scratch pattern is effectively invisible under a finish — and it handles every flat surface on a piece. A detail sander is an access tool for what a round pad cannot reach: slats, louvers, carving, square inside corners. It is slow on large flat areas. If your piece is mostly panels, buy the random orbital and do the corners by hand; if it is a slatted chair or a louvered cabinet, the detail sander stops being optional. Curves and turned legs want a shaped hand block regardless.

Can I sand furniture indoors?

You can, but plan for the dust rather than discovering it. Onboard boxes and bags catch a useful fraction and let a lot past, so fine dust goes airborne and settles across the room — including on the piece you are about to finish. Use a garage or patio if you have one. Indoors: close interior doors, seal the doorway with plastic if it opens onto living space, open a window, wear an N95 rated for sanding, and connect the sander to a vacuum rather than trusting the dust box. Check the port fits your hose first. And if the piece might predate 1978, test for lead before any dry sanding.

How do I know if my furniture is veneer, and can I sand it?

Check an edge or corner. Solid wood shows the same grain wrapping continuously around it; veneer shows a fine seam where the thin face layer meets the substrate. Other tells: a back panel finished to a visibly lower standard, or a wide panel whose grain repeats identically. You can sand veneer, but carefully — finest abrasive that will do the job, keep a powered sander moving and never let it dwell, be especially cautious at edges and corners where the layer is thinnest, and switch to a hand block anywhere you are unsure. Often the better answer is not to sand at all: a deglosser or bonding primer preps a sound finish for paint with no risk of cutting through.

Ready to make your space feel like home?

Browse the roundups I'd actually hand a client — honest picks, real trade-offs, and the one to buy first.