Skip to content
IMH

Best Picks

The Best Furniture Wax, Matched to What You Are Actually Sealing

Wax is the finish people reach for last and understand least. Here is what it genuinely protects, which tin belongs on which piece, and the two projects where you should buy something else entirely.

By Catherine Vizcaino · Home-renovation pro & founder

Updated August 2026

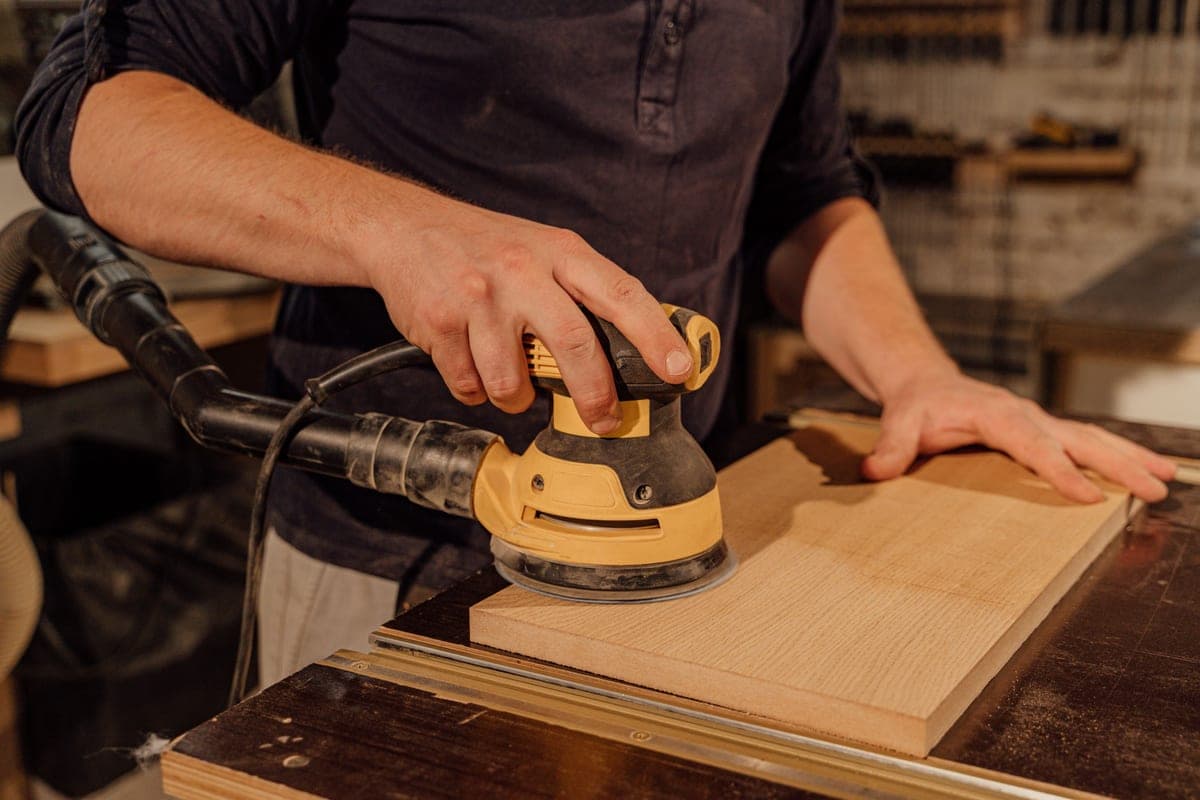
Applying wax to a wood furniture finish

As an Amazon Associate, I Heart My Home earns from qualifying purchases. It never changes your price or our picks. Learn more.

Wax is the most misunderstood product in furniture finishing. People buy it expecting a topcoat and get a polish; they buy it expecting a polish and get a coating they now have to maintain; or they wax a dining table, watch a water glass leave a white ring three weeks later, and conclude the tin was faulty. None of that is the wax’s fault. Wax does one thing extremely well and several things badly, and almost every disappointment comes from asking it to do the second group.

Here is the honest version. Furniture wax is a thin, soft, sacrificial layer that sits on top of whatever is already there. It gives a surface a low, hand-rubbed sheen that no film finish quite reproduces, it makes a piece feel wonderful under the hand, it slows down light moisture and dust, and — the part that matters most on anything old — it is reversible. A waxed surface can be cleaned back off and refinished later. A polyurethane surface cannot, not without stripping. That reversibility is exactly why restorers reach for wax and why it is the correct answer on an antique. What wax will not do is stand up to standing water, hot mugs, alcohol, or daily wiping. It is protection in the sense that a coat is protection, not in the sense that a roof is.

So the question is never really “which wax is best.” It is “does this piece want wax at all, and if so, which kind.” Before the picks, here is the order I actually work through when someone hands me a piece and asks what to put on it.

  • What is underneath the wax? Wax over a sound existing finish is a maintenance coat — easy, forgiving, almost impossible to get wrong. Wax over bare or freshly stripped wood is the actual finish, so it soaks in, needs more coats, and offers less protection than you might assume. Wax over chalk-style paint is a topcoat the paint genuinely needs, because chalk paint on its own is porous and will scuff and stain. Those are three different jobs, and they want different products.
  • How hard will the surface be used? This is the question that eliminates wax fastest. A dining table, a kitchen island, a bathroom vanity, a desk that takes a laptop and a coffee every day — wax is not enough on any of them, and I would rather say so on a page recommending wax than let you find out with a ring in the middle of the table. Side tables, dressers, headboards, bookcases, mirror frames, chairs, and anything decorative are exactly where wax belongs.
  • Solvent-based or low-odor? Traditional paste waxes are carried in a solvent that flashes off as you work, and that is what lets them clean while they wax. It also means real fumes. If the project is happening in a garage with the door open, that is fine. If it is happening in a spare bedroom in February, buy a wax whose listing states it is odor-free, and open a window anyway.
  • Clear or tinted? Clear wax is neutral and forgiving. Dark and tinted waxes deposit color into grain, carving, and brush texture, which is how you age a piece deliberately — and they are much harder to undo than to apply. The rule that saves people is simple: seal with clear first, then work dark wax over the top of it, so the clear coat controls how much color the surface can absorb.
  • Are you buying the tin or the technique? Wax rewards thin coats, real buffing, and patience more than it rewards brand loyalty. A cheap wax applied thin and buffed properly looks better than an expensive wax laid on thick and left to go cloudy. Budget for a brush and a stack of clean cloths, not just the wax.

The nine buys below cover that spread: the paste wax that handles most furniture, a low-odor wax for chalk paint and indoor work, a clean-and-wax for grimy antiques, a dark wax for depth, a neutral paste wax for light woods, a micro-crystalline wax for precious and mixed-material pieces, a food-grade beeswax for kitchen wood, the brushes that apply all of them, and — because buyer-first means telling you when the category is wrong — the film topcoat to buy instead when the piece is a tabletop. If the piece is being painted first, read the furniture paint guide, since the paint decides whether it needs wax at all. If it is going back to bare wood first, the sanders roundup covers the step before this one.

One honesty note before you shop. I renovate homes for a living, so I have waxed a great deal of furniture, trim, and salvaged doors, and I will tell you plainly what I have seen. But I have not bench-tested these specific tins against each other and I am not going to pretend otherwise: every product detail named below comes from the manufacturer’s own Amazon listing, and where a listing does not state something, this page tells you to check rather than guessing on your behalf. Prices move constantly, so you will see a live, daily-updated price with a Check price on Amazon button as the fallback when a price is briefly stale. As an Amazon Associate we earn from qualifying purchases at no cost to you — our editorial policy and affiliate disclosure explain exactly how that works.
Quick picks at a glance

#ProductBest forPrice
1
Applying wax to a wood furniture finish
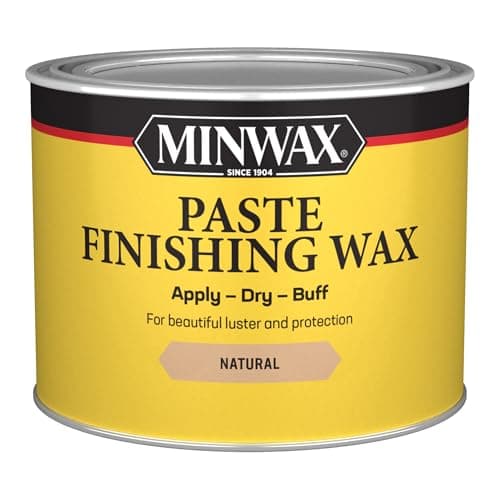
Minwax Paste Finishing Wax, Natural, 1 lb

A one-pound tin of clear paste wax in the natural shade - the traditional, widely stocked default that suits bare wood, sealed wood, and painted pieces alike.

the first and often only wax most furniture needs
2
Painting a dresser with a brush during a DIY project
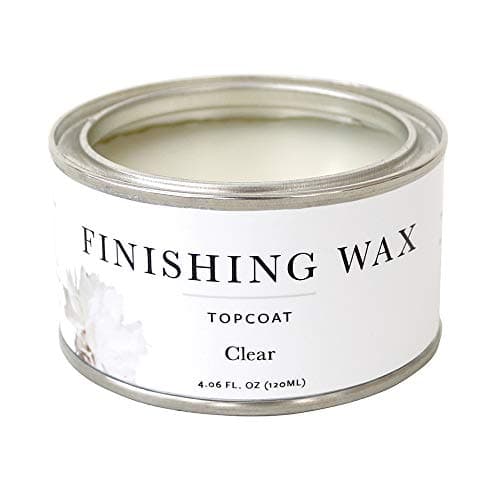
Jolie Finishing Wax - Protective topcoat Paint - Use on interior furniture, cabinets, walls, home decor and accessories - Odor-Free, Non-Hazardous - Clear - 120 ml

A small tin of clear finishing wax whose listing states it is odor-free and non-hazardous - the practical difference when the project is happening in a room you also sleep in.

sealing chalk-style paint indoors, without the fumes
3
A vintage-styled room with antique furniture and warm accents
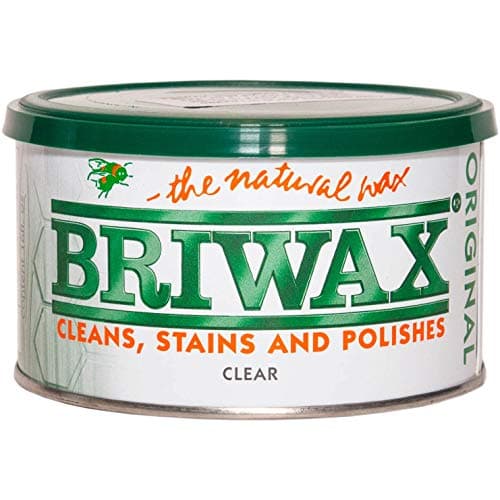
Briwax Furniture Wax for Wood, Cleans, Stains, and Polishes, Multi-Purpose, Clear

A traditional multi-purpose furniture wax the listing describes as cleaning, staining, and polishing - the one to reach for when the piece is dirty as well as dull.

grimy antiques that need cleaning and waxing in one pass
4
A rustic room with natural wood and warm textures
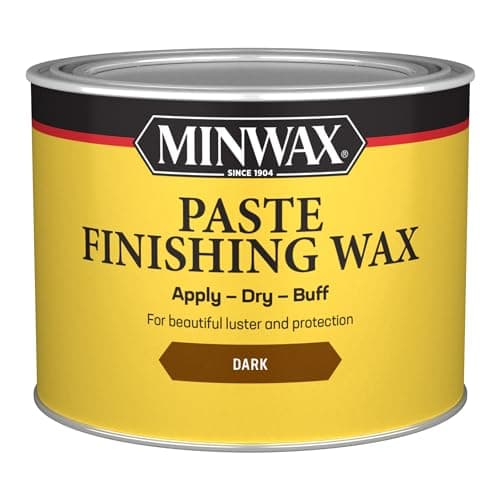
Minwax 786004444 Paste Finishing Wax, 1-Pound, Special Dark

The dark version of the same paste wax - a tinted wax that settles into grain, brush texture, and carving to give a piece the shadow it would otherwise have taken decades to earn.

adding depth, age, and shadow to grain and carving
5
Polishing a wood furniture surface with a cloth
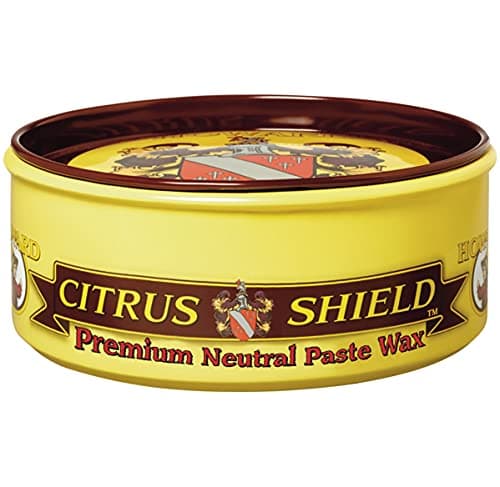
Howard CS0014 Citrus Shield Paste Wax, Wood Furniture Polish, Wood Cleaner, 11-Ounce, Neutral

An eleven-ounce paste wax the listing also describes as a wood polish and cleaner, in a neutral shade that will not tint pale woods or painted finishes.

regular upkeep on pieces you actually use
6
A styled shelf with vases, books, and ceramics
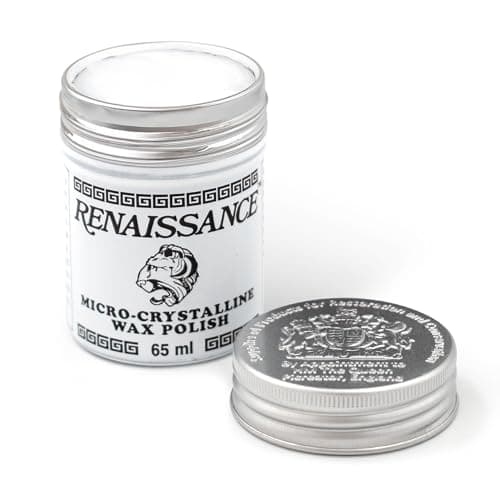
Renaissance Micro-Crystalline Wax Polish (65 ml)

A small tin of micro-crystalline wax polish - the conservation-world choice, and the one to use on hardware, inlay, and anything genuinely valuable.

the piece you would be upset to get wrong
7
A warm kitchen with wood counters and decor
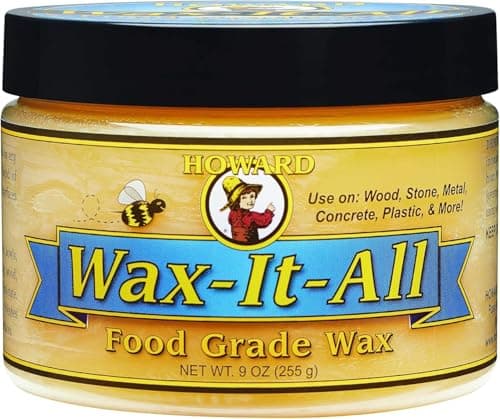
HOWARD WAX-IT-All - Protective Food-Grade Wax, Beeswax Wood Polish: Beautifies and Extends the Finish of Surfaces, Food Grade Beeswax Ideal for Wood, Stone, Metal, Cement, Paint, Plastics, 9 Fl oz

A food-grade beeswax the listing describes for wood, stone, metal, cement, paint, and plastics - the wax for kitchen surfaces where the other tins on this page do not belong.

butcher block, cutting boards, and wood that touches food
8
A renovation workshop with tools and a workbench
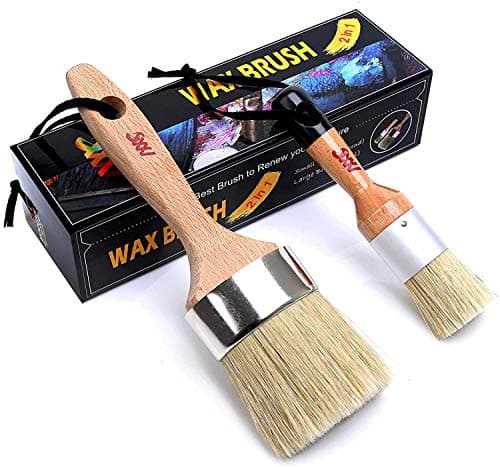
Chalk and Wax Paint Brushes for Furniture, 2 Pack Natural Bristles

A two-pack of round natural-bristle brushes - the applicator that gets wax into the places a cloth flattens over, and the cheapest upgrade to your results on this page.

getting wax into carving, spindles, and detail
9
A styled wood coffee table in a living room
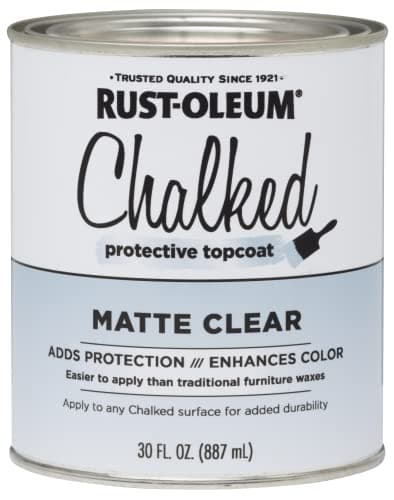
Rust-Oleum Chalked Ultra Matte Clear Top Coat Paint

Not a wax at all - a brush-on clear topcoat in an ultra matte sheen, included here because a hard film is what a dining table, desk, or vanity actually needs.

the tabletop where wax is genuinely the wrong answer

Tap any row to jump to the full write-up. Prices open on Amazon in a new tab.

How we chose these picks

Every pick here is chosen the way I’d choose it for a client’s home: real-world durability first, build quality and materials second, and value for the money third. Where I’ve installed or lived with a product on a job, I say so and tell you what I saw. Where a pick is based on research and verified buyer feedback rather than hands-on use, I say that too — I never claim to have tested something I haven’t.

Read our full editorial policy for how we evaluate and update these guides.

1

Minwax Paste Finishing Wax, Natural, 1 lb

Minwax · Best for the first and often only wax most furniture needs

Applying wax to a wood furniture finish

A one-pound tin of clear paste wax in the natural shade - the traditional, widely stocked default that suits bare wood, sealed wood, and painted pieces alike.

If someone is buying one tin of wax and does not yet know everything they will use it on, this is the one I point at. It is clear, it is neutral, it works over bare wood, over an old sound finish, and over chalk-style paint, and it behaves the way every piece of wax advice you will read assumes your wax behaves - which is worth more than it sounds when you are learning the technique. Paste wax is a technique product: the difference between a beautiful result and a cloudy, streaky one is almost entirely how thin you apply it and how thoroughly you buff, not which tin you bought. Learning that on a widely available, moderately priced, forgiving natural-shade wax is the right way in. The one-pound size also removes the most common beginner mistake, which is rationing wax because the tin felt expensive and then never applying enough to buff evenly.

$13.79 · View on Amazon

#ad · disclosure · Price as of September 19, 2026

Pros

  • The natural shade is the safe choice: it adds sheen and depth without depositing color, so it will not darken a pale wood or muddy a light painted finish
  • A full pound is a great deal of wax - paste wax goes on in coats measured in smears, so one tin realistically covers many pieces rather than one
  • It is the most widely stocked furniture wax there is, which matters more than it sounds: you can replace it anywhere, and every technique guide you find is describing this consistency

Cons

  • Solvent-carried like most traditional paste waxes, so it has a real smell while you work - fine in a garage, unpleasant in a closed spare room, and worth ventilating for
  • The wide, shallow tin is genuinely awkward to work out of once you are past the first inch, and the lid is stiff enough that a flathead screwdriver becomes part of the kit
  • It is still wax, so it is not a tabletop finish - hot mugs, standing water, and daily wiping will get through it no matter how many coats you apply
Painting a dresser with a brush during a DIY project

A small tin of clear finishing wax whose listing states it is odor-free and non-hazardous - the practical difference when the project is happening in a room you also sleep in.

Chalk-style paint has one weakness, and it is not coverage - it is that the dried film is porous and needs a topcoat to survive being touched. Wax is the traditional answer, and this is the wax I would hand to someone doing that job in a bedroom or a small apartment rather than a garage. Traditional paste waxes clean as they go because they are carried in solvent, and that solvent is the smell. A wax whose own listing claims odor-free and non-hazardous removes the reason most people wax outside, which in practice means it removes the reason most people put the job off until spring. The size is the honest trade-off in both directions: small enough to be the right buy for one chair, too small to be the right buy for a whole bedroom set. Measure the piece and work out how many tins the job needs before you order.

$21.95 · View on Amazon

#ad · disclosure · Price as of September 19, 2026

Pros

  • The listing states odor-free and non-hazardous, which is the single most useful attribute a wax can have for apartment dwellers, renters, and anyone working in a spare bedroom in winter
  • Named in the listing for interior furniture, cabinets, walls, home decor and accessories, so it is aimed squarely at the chalk-paint workflow rather than at raw lumber
  • A small 120 ml tin is easy to work out of and easy to finish, which suits a single piece far better than committing to a pound of wax you may not use again

Cons

  • 120 ml is genuinely small - fine for a nightstand or a chair, and not enough for a large dresser plus its drawers, so buy two if the piece is big
  • Costs noticeably more per ounce than a traditional hardware-store paste wax, which is the price of the low-odor formulation
  • Listed for interior use, so it is not the product for a porch bench, a garden gate, or anything that lives outside
3

Briwax Furniture Wax for Wood, Cleans, Stains, and Polishes, Multi-Purpose, Clear

Briwax · Best for grimy antiques that need cleaning and waxing in one pass

A vintage-styled room with antique furniture and warm accents

A traditional multi-purpose furniture wax the listing describes as cleaning, staining, and polishing - the one to reach for when the piece is dirty as well as dull.

There is a very specific piece this is for, and most people recognize it immediately: something found at an estate sale or inherited from a relative, structurally fine, with a finish buried under years of grime, old polish, and hand oils. Sanding that piece would be vandalism, because the original finish and patina are most of what makes it worth having. Cleaning it and waxing it is exactly right, and a wax that does both at once turns a two-product job into one. What earns it a place over a plain paste wax is that combination; what it costs you is fume tolerance and the need to test first. I want to be very clear about that test, because solvent will soften shellac, and a lot of pre-war furniture is shellacked. Pick a spot nobody sees - the back of a leg, the underside of an apron - apply a little, work it, and see what comes off on the cloth and what happens to the surface before you commit to the whole piece.

$29.00 · View on Amazon

#ad · disclosure · Price as of September 19, 2026

Pros

  • The listing describes it as cleaning as well as polishing, which is exactly what a neglected secondhand piece needs - the wax lifts decades of grime while it goes on
  • A long-established name in furniture restoration, so technique guidance for it is easy to find and the product behaves the way restorers describe
  • The clear version deposits no color, so it revives a piece without changing the shade of the wood underneath

Cons

  • That cleaning action comes from solvent, which means strong fumes and real ventilation requirements - this is a garage or open-window product, not a bedroom one
  • Solvent-based waxes can soften or lift some existing finishes, especially shellac and older lacquers, so a hidden-area test is not optional here, it is the first step
  • Costs more than a basic hardware-store paste wax, and the difference only pays for itself when the piece actually needs the cleaning half of the job
4

Minwax 786004444 Paste Finishing Wax, 1-Pound, Special Dark

Minwax · Best for adding depth, age, and shadow to grain and carving

A rustic room with natural wood and warm textures

The dark version of the same paste wax - a tinted wax that settles into grain, brush texture, and carving to give a piece the shadow it would otherwise have taken decades to earn.

Dark wax is the technique that separates a painted piece that looks homemade from one that looks like it came out of a shop, and it is also the fastest way to ruin an afternoon's work. Both things are true, which is why it belongs on this page with a warning attached rather than being left off it. The effect is real: color settles into everything recessed - open grain, the low points of brush texture, the inside of carving, the routed line on a drawer front - and the eye reads that shadow as age. Buying the dark version of a wax you already own the clear version of is the correct way to do this, because the two-step method is the one that works. Seal the surface with clear wax first, let it set, then work dark wax over the top and wipe most of it straight back off. The clear coat limits how deep the color can bite, which converts an irreversible decision into an adjustable one.

$15.19 · View on Amazon

#ad · disclosure · Price as of September 19, 2026

Pros

  • Deposits color where a surface is porous or recessed, which is what makes grain, carving, and brush strokes read as depth rather than as flatness
  • It is the standard, widely available way to warm up a piece that came out of the paint can looking too new, without repainting anything
  • Same one-pound size and same familiar consistency as the natural version, so the technique transfers directly and the two work together as a system

Cons

  • Far less forgiving than clear wax - dark wax goes on fast, dries into porous areas, and removing it from a spot you overdid means solvent, effort, and sometimes a redo
  • Applied straight onto raw or freshly chalk-painted surfaces it can grab unevenly and blotch, which is why it wants a clear wax underneath as a barrier coat
  • Solvent-carried and strongly scented like the natural version, so plan on ventilation for the whole session
Polishing a wood furniture surface with a cloth

An eleven-ounce paste wax the listing also describes as a wood polish and cleaner, in a neutral shade that will not tint pale woods or painted finishes.

Not every waxing job is a project. A great deal of it is upkeep: the console table in the hall, the dresser in the bedroom, the dining chairs that are wood rather than upholstered, all of which look tired long before anything is actually wrong with them. This is the tin for that work. A neutral paste wax that also cleans lets you do the whole maintenance pass in one go - lift the film of hand oils and dust, then leave a thin protective coat with a low sheen behind. I have singled it out over a generic maintenance wax for a practical reason rather than a chemical one: if you already use Howard's conditioner on oiled and antique wood, staying inside one product family keeps the routine simple and avoids stacking mismatched products on the same surface. The ones to keep away from anything you might refinish later are the silicone sprays, and this is not one of those.

$16.4913% off

$14.29 · View on Amazon

#ad · disclosure · Price as of September 19, 2026

Pros

  • Neutral is the right default for light woods, painted pieces, and anything you do not want to deepen in color at all
  • Described in the listing as a polish and cleaner as well as a wax, so it handles the maintenance coat and the light clean in one product
  • Comes from the same product family as the Howard conditioner recommended in my furniture polish roundup, so the two form a coherent care routine rather than a mix of competing chemistries

Cons

  • At eleven ounces it is smaller than the one-pound tins here, and paste wax is one of the few products where the bigger tin is usually the better value
  • Neutral means neutral - if the goal is to add warmth or disguise light wear on dark wood, a tinted wax will do more for you
  • Like every wax on this page it is a maintenance finish, so plan on reapplying it periodically rather than treating it as sealed and done
6

Renaissance Micro-Crystalline Wax Polish (65 ml)

Renaissance · Best for the piece you would be upset to get wrong

A styled shelf with vases, books, and ceramics

A small tin of micro-crystalline wax polish - the conservation-world choice, and the one to use on hardware, inlay, and anything genuinely valuable.

There is a category of object that does not belong anywhere near a solvent cleaning wax: the inherited box, the brass hardware you spent an evening polishing, the marquetry panel, the mirror frame with gilding on it, the piece where a mistake is not a redo but a loss. Micro-crystalline wax is what the conservation world uses on exactly those, and the reasoning is worth understanding even if you never buy the tin. It is chosen because it is stable, because it does not yellow the way some natural waxes can over long periods, and because it can be removed later without taking the surface with it. That is a very different set of priorities from a furniture wax designed to clean and shine. Buy it for the small and the precious rather than for the dining set - and be honest with yourself about which category a piece is in before you decide.

$36.99 · View on Amazon

#ad · disclosure · Price as of September 19, 2026

Pros

  • Micro-crystalline waxes are the type used in conservation work, which is precisely the context where a coating has to be stable and removable rather than merely shiny
  • The listing presents it as a polish across materials, which is what makes it useful on a piece that mixes wood with metal hardware, leather, or inlay
  • The 65 ml tin goes an extremely long way, because micro-crystalline wax is applied in coats thin enough to be nearly invisible

Cons

  • By far the highest cost per ounce on this page, which makes it the wrong choice for a whole dresser and the right one for handles, hinges, inlay, and small treasures
  • The tin is genuinely tiny, so anyone expecting a furniture-sized quantity will be surprised when it arrives
  • It is a protective and stabilizing wax rather than a cleaning one, so a dirty piece still has to be cleaned first with something else
A warm kitchen with wood counters and decor

A food-grade beeswax the listing describes for wood, stone, metal, cement, paint, and plastics - the wax for kitchen surfaces where the other tins on this page do not belong.

Kitchens are where wax advice goes wrong most often, because the correct product changes completely the moment food touches the wood. A solvent-carried furniture wax has no business on a cutting board or a butcher block counter, and this is the pick that covers that gap. What makes it worth owning beyond boards is the surface list in its own title: stone, cement, and metal as well as wood. That is a genuinely useful spread in a renovated kitchen, where the same afternoon might involve a butcher block island, a stone or concrete surface, and a piece of raw steel shelving. Treat it as the second half of a two-step routine rather than a standalone finish. Oil feeds the wood; wax slows the water down on the way in. Kitchen wood wants both.

$19.77 · View on Amazon

#ad · disclosure · Price as of September 19, 2026

Pros

  • Stated as food-grade in the listing, which is the one attribute that matters on a cutting board, a butcher block counter, or a wooden salad bowl
  • Listed for stone, metal, cement, paint, and plastics as well as wood, so it covers a concrete counter, a stone sill, and a butcher block island with one product
  • Beeswax has no solvent smell to speak of, which makes it a comfortable product to use in an occupied kitchen rather than a garage

Cons

  • It is a soft wax, so on a working kitchen surface it needs reapplying often - on a board in daily use that means regularly, not annually
  • Not a substitute for oiling raw butcher block: the standard routine is a conditioning oil first with wax over the top, and wax alone leaves the wood thirstier than it should be
  • Being food-grade means being mild, so it will not clean a neglected surface - clean and dry the wood thoroughly before any of it goes on
8

Chalk and Wax Paint Brushes for Furniture, 2 Pack Natural Bristles

Best for getting wax into carving, spindles, and detail

A renovation workshop with tools and a workbench

A two-pack of round natural-bristle brushes - the applicator that gets wax into the places a cloth flattens over, and the cheapest upgrade to your results on this page.

This is the item people skip and then wonder why their results do not look like the ones they were copying. A cloth is perfectly good on a flat panel and useless on anything shaped: press a folded rag onto a turned leg or a carved drawer front and it contacts the high points and bridges over everything recessed, which is precisely backwards, since the recesses are where wax and especially dark wax do their work. A round brush pushes paste into that detail. Two brushes rather than one is not upselling either - once you own clear wax and dark wax, they need separate brushes, because dark pigment left in a bristle head will find its way into the next clear coat you apply. The cost of the pair is small compared with any tin on this page, and it changes the outcome more than swapping brands of wax would.

$14.97 · View on Amazon

#ad · disclosure · Price as of September 19, 2026

Pros

  • Natural bristles per the listing, which is the right fiber for wax - it carries and releases a paste far better than a synthetic brush does
  • A two-pack means one brush for clear wax and one for dark, which is the setup the two-step aging method actually requires
  • The round shape works wax down into carving, spindles, turned legs, and open grain, where a folded cloth simply bridges over the detail and leaves it bare

Cons

  • Wax brushes need real cleaning after every session or the bristles set solid, and cleaning a wax brush is a slower, messier job than cleaning a paint brush
  • Natural bristles shed a little at first, so run a new brush over your hand and pull the loose ones out before it touches a finished surface
  • A brush makes it easier to apply too much wax, which is the most common mistake in the whole category - it still has to be buffed back off
9

Rust-Oleum Chalked Ultra Matte Clear Top Coat Paint

Rust-Oleum · Best for the tabletop where wax is genuinely the wrong answer

A styled wood coffee table in a living room

Not a wax at all - a brush-on clear topcoat in an ultra matte sheen, included here because a hard film is what a dining table, desk, or vanity actually needs.

Every honest roundup should include the moment where its own category loses. Wax cannot protect a dining table, a desk that takes a coffee cup every morning, a bathroom vanity, or a kitchen-adjacent surface, and no number of coats changes that, because wax is soft by design. When someone tells me they are painting a table, I do not point them at wax - I tell them to use a film topcoat and save the wax for the chairs. This is the plain, widely available version of that product: brush-on, ultra matte so it keeps the chalk-paint look, and hard enough to handle real use. The reason it sits at the end of a wax page rather than being left off it is sequencing. Waxing first and discovering the problem later is expensive, because you cannot topcoat over wax - it has to be removed first. Deciding correctly before the first coat costs nothing.

$27.18 · View on Amazon

#ad · disclosure · Price as of September 19, 2026

Pros

  • Forms a continuous film rather than a soft sacrificial layer, which is the difference between a surface that survives a wet glass and one that marks
  • The ultra matte sheen keeps the flat, chalky look people choose chalk-style paint for, so protecting the piece does not turn it glossy
  • Brush-on application means no spray equipment, no masking a room, and no overspray to manage - the whole job is a brush and a couple of thin coats

Cons

  • It is not reversible the way wax is, so it is the wrong choice on anything with antique value where the finish should stay removable
  • Matte topcoats can look slightly milky if applied too thick, so thin coats and a light sand between them matter more here than with wax
  • It cannot go over a waxed surface - if the piece is already waxed, the wax has to come off first or the topcoat will not bond

Wax or a film topcoat: the decision that comes first

Almost every wax disappointment traces back to this one choice being made by default rather than deliberately. Wax and a film topcoat are not competing brands of the same thing. They protect differently, fail differently, and are undone differently, and the piece in front of you usually makes the decision obvious once you know what to weigh.

  • Wax is a soft, thin layer sitting on the surface. It gives a low, hand-rubbed sheen, feels superb, slows light moisture, and stays fully reversible — it can be cleaned off and the piece refinished later with nothing lost. What it cannot survive is standing water, heat, alcohol, or daily wiping. It also needs renewing, roughly annually on anything handled regularly.
  • A film topcoat — polyacrylic, water-based poly, or a purpose-made chalk-paint topcoat — cures into a continuous hard skin. It shrugs off water rings and daily use and does not need renewing. In exchange it is permanent for practical purposes, it can look slightly plastic if applied heavily, and it changes what a future refinish involves.
  • The surfaces that decide it. Dining tables, desks, kitchen islands, bathroom vanities, coffee tables, and anything that sits under a plant pot want a film. Dressers, headboards, bookcases, mirror frames, chairs, side tables, decorative pieces, and every genuine antique want wax.
  • The order matters and only runs one way. A topcoat can be applied over paint and later waxed if you want to soften the sheen. A topcoat cannot be applied over wax — nothing bonds to wax, which is the entire point of it. If a piece is already waxed and now needs a film, the wax has to be stripped first.

When a piece has both kinds of surface, split it. Film on the top, wax on the legs and frame. The sheens sit close enough that nobody notices, and each surface gets the protection it actually needs. If the painting decision is still open, the furniture paint roundup covers which paints need a topcoat at all — some all-in-one formulas include their own and skip this question entirely.

How to apply furniture wax so it still looks right in five years

Waxing is not difficult, but it is unforgiving of exactly one habit: applying too much. Wax is a product you put on and then take almost all of back off. Nearly every cloudy, sticky, or streaky waxed surface is one that was loaded up and never fully buffed. Here is the sequence that works on almost anything.

  • Clean and degrease first, always. Wax seals in whatever is underneath it, so hand oils, old silicone polish, and kitchen grease all get locked in place and stop the wax sitting evenly. Wash the piece, let it dry completely, and only then open the tin.
  • Let paint cure, not just dry. Chalk-style paint is touch-dry within the hour and nowhere near cured. Waxing a soft film traps solvent underneath and leaves a topcoat that stays slightly tacky for weeks. Overnight is the minimum, longer in a cold or humid room.
  • Apply thin, and work with the grain. A cloth for flat panels, a brush for carving, spindles, and texture. Whatever you think a thin coat is, halve it. You are aiming to wet the surface, not to build a layer.
  • Let it haze, then buff properly. Follow the label’s stated time, then buff with a clean cloth until the surface stops dragging and starts feeling slick. Buffing is where the sheen comes from — skip it and you get a dull, slightly tacky finish instead.
  • Second coat only if it needs one. Bare or freshly stripped wood usually wants two or three coats, since the first mostly soaks in. Wax over an existing sound finish normally needs one. Let each coat haze and buff before the next.
  • Give it a few days before hard use. Wax keeps hardening after buffing. Put the drawers back and enjoy the piece, but do not stand a heavy lamp or a plant on a freshly waxed surface for the first several days.

Two cautions worth repeating. Test any solvent-based wax on a hidden area first, because it can soften shellac and some older lacquers — the back of a leg or the underside of an apron is the place to find that out. And ventilate: traditional paste waxes carry real solvent, and a closed room with no airflow is an uncomfortable way to spend an afternoon.

Dark wax without the regret

Dark wax is the single most transformative thing on this page and the easiest to overdo. Used well it puts shadow into grain, carving, brush texture, and routed detail, and the eye reads that shadow as age — it is the difference between a painted piece that looks freshly painted and one that looks like it has been somewhere. Used badly it turns a pale finish muddy in about ninety seconds.

The method that makes it controllable has one non-negotiable step: seal with clear wax first. A coat of clear wax fills the pores and limits how deeply the dark can bite, which turns a permanent decision into an adjustable one. Work dark wax over that clear coat in small sections, wipe most of it straight back off with a clean cloth, and stop far earlier than feels finished — dark wax always looks lighter while it is wet than it will once it has set.

Keep clear wax nearby the whole time, because clear wax is the eraser. Working it over an area that has gone too dark while the dark is still soft lifts pigment back out and lets you dial the effect in. Once the dark has fully set that window closes and you are into solvent and effort. Start on the back or the underside of a piece, since the first section is always the heaviest, and let the recessed areas carry the color while the flat, high-touch surfaces stay lighter — that is how genuine wear actually distributes itself.

One thing dark wax is not: a stain. It sits in and on the surface rather than penetrating the wood, so it is a finishing effect rather than a color change. If the goal is to change the color of bare wood, that is a stain job and it happens before any wax touches the piece — and it happens after sanding, which the sanders for furniture roundup covers in detail.

Living with a waxed piece

A waxed finish is a maintained finish. That is not a flaw to be engineered around, it is the deal, and pieces looked after this way stay beautiful for decades. The routine is genuinely small once you know it.

  • Dust dry. A soft dry cloth handles most of it. Waxed surfaces do not want to be wet.
  • No all-purpose sprays, wipes, or ammonia. They cut wax off, which is exactly what wax is designed to allow. That is a feature when you are refinishing and a problem when you are cleaning. A barely damp cloth with a dry one behind it covers ordinary spills.
  • Refresh once or twice a year. On handled surfaces — chair backs, drawer fronts, a hall console — a thin new coat annually is about right. Decorative pieces can go far longer. You will feel when it is due: the surface stops feeling slick and starts feeling dry.
  • Deal with water rings early. A white ring in wax is moisture trapped in the wax layer rather than damage to the wood, and it will often lift with a fresh application of the same wax worked over the mark. Wait months and the moisture moves into the finish underneath, which is a much larger job.
  • Do not stack products. Pick a wax and stay with it. Layering a silicone spray polish over a waxed piece is the combination that causes cloudiness now and complicates refinishing later — the furniture polish roundup explains which everyday products are safe on which finishes.

If a waxed surface has gone cloudy or sticky, it is almost always too much wax rather than the wrong wax. The fix is a light coat of the same product to soften what is already there, followed by a thorough buff with clean cloths — changed as they load up, so you are removing wax rather than redistributing it.

When not to wax at all

A page recommending wax should be equally clear about the projects where the honest answer is to put the tin down. These come up constantly, and each of them ends badly if wax is used anyway.

  • Hard-working horizontal surfaces. Dining tables, desks, kitchen islands, bathroom vanities, and anything that regularly holds a drink. Wax is soft by design and will mark. Use a film topcoat, and put the wax on the chairs.
  • Anything going outdoors. Porch benches, garden furniture, and gates need an exterior finish. Interior wax will not survive sun and rain, and reapplying it every few weeks is not a plan.
  • Floors. Modern polyurethane floor finishes are not meant to be waxed, and wax on a floor creates a slip hazard as well as a maintenance headache. Whatever a tin says about multiple surfaces, treat floors as a separate product category.
  • Surfaces you might topcoat later. Nothing bonds to wax. If there is any chance the piece will need a hard finish down the line, do that first — you can always wax over a cured topcoat to soften the sheen, but you cannot go the other way without stripping.
  • Pieces that are merely dirty. Wax on top of grime seals the grime in. Clean first, dry fully, then decide whether the finish underneath actually needs wax or just needed washing.
  • Laminate, melamine, and printed foil. There is no wood there to feed and no porosity for wax to key into, so it sits on the surface and stays slightly greasy. A bonding primer and paint is the right approach on flat-pack furniture — the DIY decor guide walks through those projects.

Where wax genuinely belongs — antiques, painted furniture that is not a work surface, bare wood you want to feel rather than seal, hardware, and anything whose finish you might want to change your mind about later — nothing else gives quite the same result. Use it there, deliberately, and buy the film topcoat for everything else.

Frequently asked questions

Does furniture wax actually protect wood?

Yes, but less than most people assume and in a specific way. Wax leaves a thin, soft, sacrificial layer that slows light moisture, resists dust and fingerprints, and takes the wear that would otherwise land on the finish beneath it — genuine protection for a dresser, bookcase, headboard, or chair. It is not a barrier against standing water, hot mugs, alcohol, or daily wiping with a spray cleaner, because wax is soft by design. Tables, desks, and vanities want a film topcoat instead. Wax’s other real value is reversibility — it cleans off and lets a piece be refinished later, which is why it is the right answer on antiques and a hard topcoat is not.

Do I have to wax chalk paint?

You have to topcoat it, and wax is the traditional way. Chalk-style paint dries to a porous matte film that scuffs, stains, and marks without something over it, so sealing is not optional on anything that gets touched. Wax keeps the flat chalky look and is right on chair frames, dressers, headboards, and decorative pieces. On a tabletop or desk, use a film topcoat instead — wax will mark. Check your paint first: some all-in-one formulas include their own sealer and do not want a separate topcoat. And let the paint cure, not just dry, before waxing, or the finish stays tacky for weeks.

Clear wax or dark wax - which do I need?

Clear for protection, dark for effect — and you want the clear one first either way. Clear wax is neutral, forgiving, and the coat that does the protecting. Dark wax is a technique: it settles into grain, carving, and brush texture and reads as age. Seal with clear first, then work dark over the top and wipe most of it back off; the clear coat limits how deeply the dark can bite and makes the decision adjustable rather than permanent. Keep a cloth loaded with clear wax beside you — it lifts dark pigment back out while the dark is still soft. Start on the back of the piece, since the first section is always the heaviest.

Can I put polyurethane or a topcoat over waxed furniture?

No — not without removing the wax first. Nothing bonds to wax, which is exactly what makes it a good sacrificial layer and a bad primer. A poly, polyacrylic, or chalk-paint topcoat over wax will peel, bead, or stay soft. Removing it means mineral spirits or a wax remover, a thorough clean, and a full dry — and on a heavily waxed piece the result can still be patchy. The order runs one way only: you can wax over a cured topcoat to soften the sheen, never the reverse. Decide at the start of the project, and on a mixed piece topcoat the tabletop and wax the frame.

How often does furniture wax need reapplying?

It depends on how much the surface is handled. Daily-contact pieces — chair backs, drawer fronts, a hall console — want a coat once or twice a year. Decorative pieces that are only dusted can go several years. The surface tells you: waxed wood that is due feels dry and slightly draggy instead of slick. Reapplying is not a strip-and-redo job — clean, dry, one thin coat, let it haze, buff it out. And if a surface has gone cloudy or sticky rather than dry, that is too much wax rather than too little; the same light coat plus a thorough buff with clean cloths fixes it.

Ready to make your space feel like home?

Browse the roundups I'd actually hand a client — honest picks, real trade-offs, and the one to buy first.