Skip to content
IMH

Best Picks

The Best Peel-and-Stick Backsplash Tile - and Where It Actually Belongs

It is the cheapest kitchen change that reads as a renovation - as long as you buy the right material for the wall you are sticking it to.

By Catherine Vizcaino · Home-renovation pro & founder

Updated August 2026

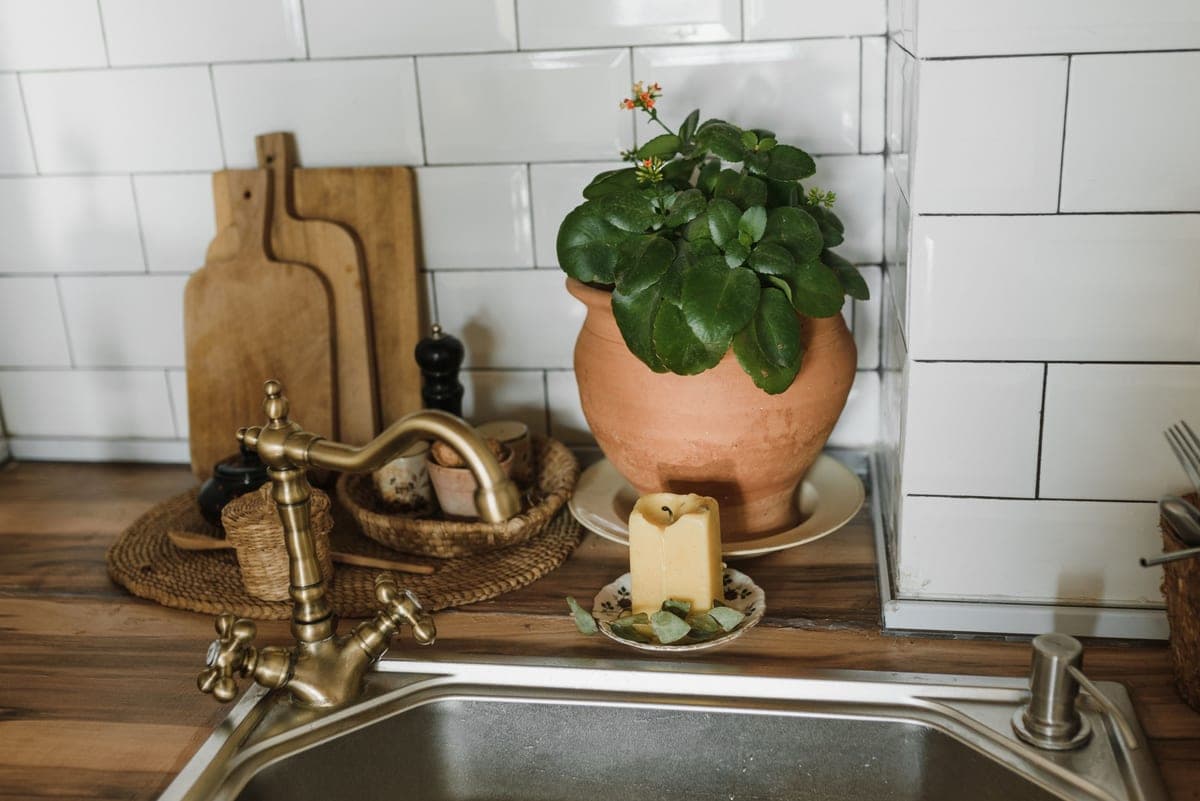
A warm kitchen with wood counters and decor

As an Amazon Associate, I Heart My Home earns from qualifying purchases. It never changes your price or our picks. Learn more.

A backsplash is a small amount of square footage doing an outsized amount of work. It sits at eye level, it catches every light source in the room, and it is the surface people photograph when they photograph a kitchen. It is also, in a real tiled installation, a weekend of mortar, spacers, a wet saw rental, and grout haze — which is precisely why peel-and-stick exists, and why it has quietly become the single most popular change people make to a kitchen they do not want to gut.

Here is the honest version of how it goes. Done on the right wall, with the right material, a peel-and-stick backsplash is startlingly convincing and takes an afternoon. Done on the wrong wall — flat paint, a textured orange-peel finish, a surface that was wiped with a greasy cloth an hour earlier — it lifts at the corners within weeks and looks exactly like what it is. The tile you choose matters far less than the two things nobody talks about: what the product is made of, and what your wall is made of.

So this guide runs in that order. First the material differences that set the price and decide where each type belongs, then nine picks covering the jobs a backsplash has to do: the classic glossy subway laid piece by piece, the cheapest honest sheet, a thicker gel tile with real depth, a faux marble, a real glass mosaic, stainless metal for the wall nearest the range, a warm neutral for kitchens that are not white, a dark option, and the small tool that decides whether any of it sticks. If the cabinets are getting attention in the same project, pair this with my cabinet hardware guide and the wider kitchen decor plan — new hardware, a new backsplash, and nothing else is the cheapest kitchen refresh there is.

One honesty note before you shop. I have installed a lot of tile, real and self-adhesive, and I will tell you plainly where this stuff earns its keep and where it does not. But I have not bench-tested these specific products against each other and I am not going to pretend otherwise: every material, size, and coverage figure below comes from the manufacturer’s own listing or a source I have linked, and where a listing does not state something, this page tells you to check rather than guessing on your behalf. Amazon pricing also moves all day, so where a live price is not available you will see a Check price on Amazon button instead of a number I cannot stand behind. As an Amazon Associate we earn from qualifying purchases at no cost to you — our editorial policy and affiliate disclosure spell out exactly how that works.

Quick picks at a glance

#ProductBest forPrice
1
A warm kitchen with wood counters and decor
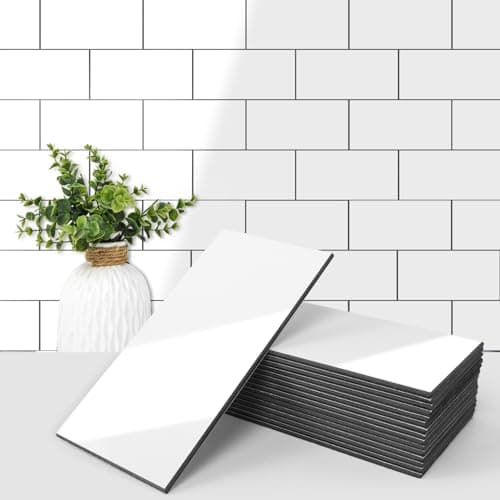
Art3d 102-Pack Peel and Stick Backsplash on Subway Tile, Glossy White

Individual subway pieces rather than a printed sheet, which is the single biggest thing separating a self-adhesive backsplash that fools people from one that does not.

the classic white subway look, laid piece by piece
2
An assortment of home goods and kitchenware
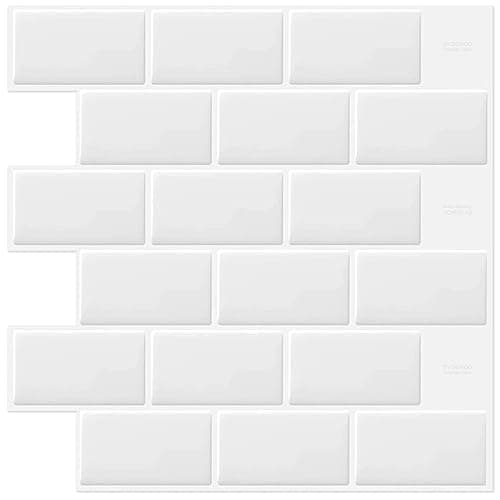
DEWOO White Peel and Stick Backsplash Subway Tile for Kitchen Wall, 10-Sheet

The fast, low-cost route: ten sheets that go up in an afternoon and are the right answer for a rental, a laundry room, or a wall you are not precious about.

covering a whole run fast, for the least money
3
An assortment of home decor accessories
STICKGOO Peel and Stick Wall Tile Self-Adhesive Backsplash, Thicker Design

A thicker gel-style tile whose raised faces and recessed joints catch light the way real ceramic does, which is the property flat printed sheets cannot fake.

the most convincing depth without laying real tile
4
An interior in earthy terracotta and sage tones
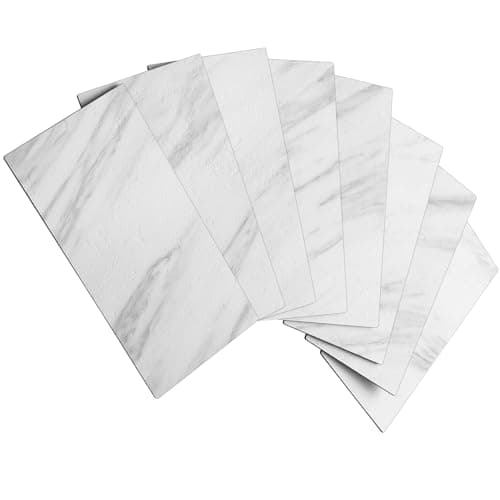
AULIGET 100-Piece White Marble Look Peel and Stick Backsplash Wall Tiles, 3 x 6 in PVC

Individual three-by-six faux-stone pieces with veining, for the kitchen that wants marble on the wall and has no intention of maintaining any.

a marble look without a marble budget
5
A renovation workshop with tools and a workbench
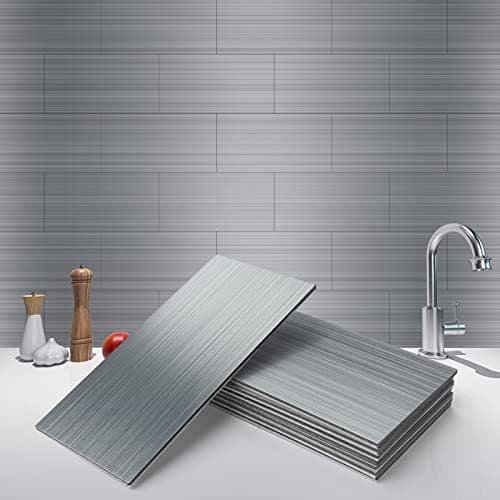
Art3d Peel and Stick Backsplash, Stainless Subway Tile, 3 x 6 in, 100-Pack

Actual metal rather than printed plastic - the material I would use in the splatter zone, and the only one in this roundup I would put close to a cooktop.

the wall nearest the range, and anywhere heat or splatter lands
6
A warm bathroom styled with towels and plants
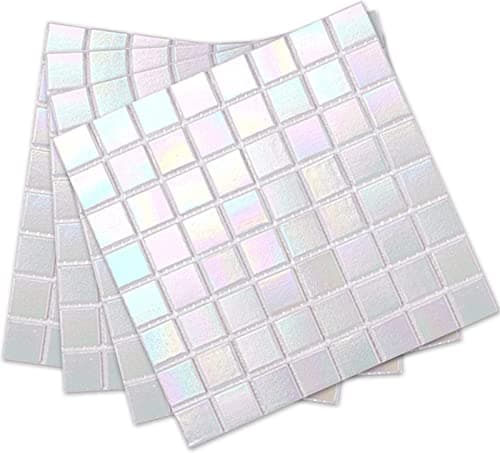
DICOFUN 40-Sheet Rainbow Peel and Stick Backsplash, 6.6 x 6.6 in White Glass Mosaic Tiles

Genuine glass mosaic on a self-adhesive backing rather than a printed imitation of one - the pick when the wall has to survive close inspection.

real glass depth on a small feature run
7
A modern farmhouse interior in cozy neutrals
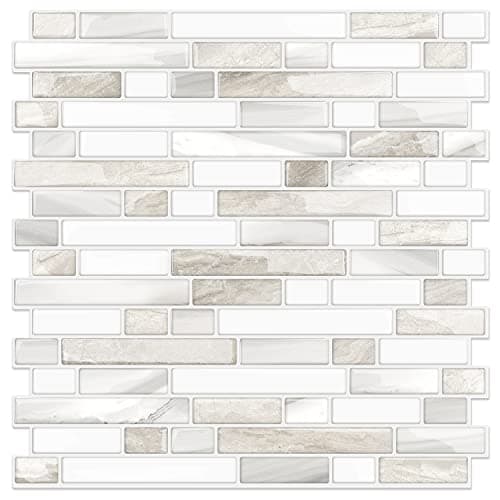
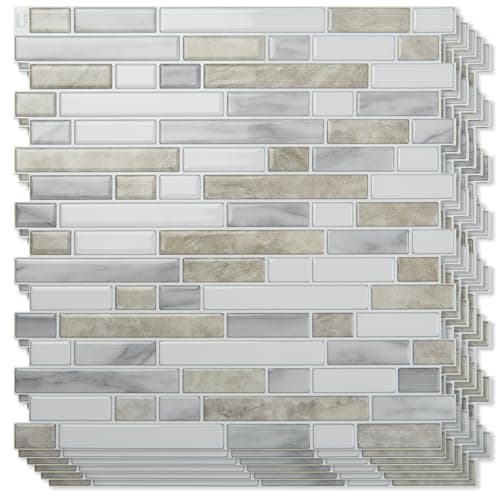
Art3d Linear Design Tile Peel and Stick Backsplash, 10-Sheet, Beige & White

A soft beige-and-white linear pattern for the very common kitchen where cream cabinets and a warm counter make a bright white backsplash look blue by comparison.

warm kitchens where stark white would fight the cabinets
8
A decorated, cozy living room with a sofa
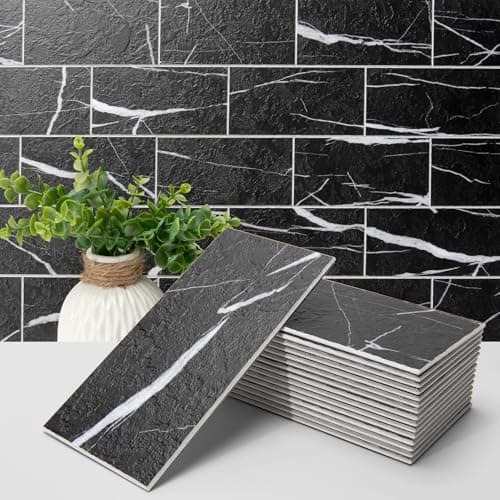
Art3d 102-Pack Peel and Stick Backsplash on Subway Tile, Black Marble

Black marble-look subway in individual pieces, for the kitchen that wants contrast rather than another quiet white wall.

a dark, high-contrast backsplash against pale cabinets
9
A renovation workshop with tools and a workbench
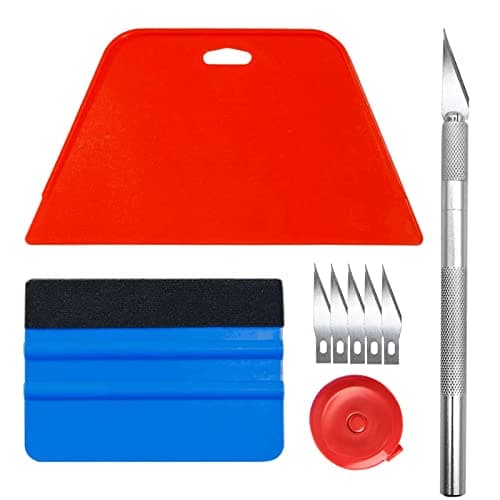
Art3d Smoothing Tool Kit for Peel and Stick Wallpaper

A felt squeegee and blade kit - the least glamorous item on this page and the one most likely to be the difference between a wall that holds and one that lifts.

the cheap add-on that decides whether any of this sticks

Tap any row to jump to the full write-up. Prices open on Amazon in a new tab.

How we chose these picks

Every pick here is chosen the way I’d choose it for a client’s home: real-world durability first, build quality and materials second, and value for the money third. Where I’ve installed or lived with a product on a job, I say so and tell you what I saw. Where a pick is based on research and verified buyer feedback rather than hands-on use, I say that too — I never claim to have tested something I haven’t.

Read our full editorial policy for how we evaluate and update these guides.

1

Art3d 102-Pack Peel and Stick Backsplash on Subway Tile, Glossy White

Art3d · Best for the classic white subway look, laid piece by piece
A warm kitchen with wood counters and decor

Individual subway pieces rather than a printed sheet, which is the single biggest thing separating a self-adhesive backsplash that fools people from one that does not.

If I had to pick one product from this whole category without seeing the kitchen, it would be glossy white subway laid as individual pieces. The reason is not the color, it is the format. Most peel-and-stick backsplash ships as a printed twelve-inch sheet with the grout lines molded in, and printed grout lines are the tell - they repeat on a fixed rhythm and the eye picks that up from across the room. Laying real pieces one at a time breaks the rhythm, lets you stagger the courses the way a tiler actually would, and puts the joints where the room wants them rather than where the sheet dictates. That is the difference between a backsplash people compliment and one people quietly identify.

$39.99 · View on Amazon

#ad · disclosure · Price as of September 19, 2026

Pros

  • Individual pieces let you set a real running bond, so the joints land where a tiler would put them
  • Glossy white is the most forgiving finish there is - it works with any cabinet color
  • Piece-by-piece laying means you can work around outlets without wasting a whole sheet

Cons

  • Slower than sheets - a hundred-plus pieces is genuinely more handling
  • Piece-laid tile is less forgiving of a crooked start; if the first course drifts, everything above it drifts
  • Gloss shows every high spot and ripple in the wall behind it
2

DEWOO White Peel and Stick Backsplash Subway Tile for Kitchen Wall, 10-Sheet

DEWOO · Best for covering a whole run fast, for the least money

An assortment of home goods and kitchenware

The fast, low-cost route: ten sheets that go up in an afternoon and are the right answer for a rental, a laundry room, or a wall you are not precious about.

There is a real and legitimate case for buying the cheapest competent version of this product, and it is not the one people expect. It is not the low price - it is the low stakes. A backsplash is the change most likely to be undone: renters move, kitchens get properly renovated later, and tastes shift. Spending a lot on a surface with a planned expiry date is a mistake, and this is the sheet I would put in a rental kitchen, a laundry room, or above a garage sink without a second thought. Buy the good stuff for the wall you will look at for ten years; buy this for the wall you will look at for two.

$26.88 · View on Amazon

#ad · disclosure · Price as of September 19, 2026

Pros

  • Sheet format covers ground several times faster than laying individual pieces
  • Lowest entry price in this roundup, which makes a whole-wall attempt cheap
  • White subway is the safest pattern to buy without seeing samples in your own light

Cons

  • Molded grout lines repeat on a fixed grid, which is what gives sheet tile away up close
  • Seams between sheets need deliberate overlapping or they read as a visible break
  • Thin sheet material telegraphs any bump or seam in the wall behind it
3

STICKGOO Peel and Stick Wall Tile Self-Adhesive Backsplash, Thicker Design

STICKGOO · Best for the most convincing depth without laying real tile

An assortment of home decor accessories

A thicker gel-style tile whose raised faces and recessed joints catch light the way real ceramic does, which is the property flat printed sheets cannot fake.

Depth is the thing your eye checks first, before color and before pattern. A real tiled wall is not flat - each piece stands slightly proud and each joint sits slightly recessed, so raking light from a window or an under-cabinet strip throws a tiny shadow along every grout line. A flat printed sheet has no shadow to throw, which is why it can look perfect in a photo and obviously fake in person. The thicker gel-style tiles solve exactly that, and in a kitchen with under-cabinet lighting - where light rakes hard across the wall at close range - they are worth the premium over a flat sheet in a way almost nothing else in this category is.

$34.99 · View on Amazon

#ad · disclosure · Price as of September 19, 2026

Pros

  • Raised tile faces with genuinely recessed joints, so the shadow line is real, not printed
  • Extra thickness helps bridge minor imperfections in the wall behind it
  • Reads convincingly at conversational distance, which is where a backsplash is actually judged

Cons

  • Thicker tile is harder to cut cleanly - plan on a fresh blade and more passes
  • Recessed joints collect kitchen grease and need wiping more often than a flat sheet
  • Costs noticeably more per square foot than plain printed sheets
4
An interior in earthy terracotta and sage tones

Individual three-by-six faux-stone pieces with veining, for the kitchen that wants marble on the wall and has no intention of maintaining any.

Marble is the finish clients ask for most and regret most. Real marble on a kitchen backsplash is porous, it etches when lemon juice or vinegar so much as touches it, and it wants sealing on a schedule nobody keeps. On a backsplash specifically - a vertical surface nobody chops on - the visual payoff is the entire point and the maintenance is pure downside. Faux stone in individual pieces gives you the veining and the light-bouncing pale field without any of that, and because these are laid piece by piece rather than as a printed sheet, you control where the veining falls instead of accepting a repeat.

$44.99 · View on Amazon

#ad · disclosure · Price as of September 19, 2026

Pros

  • Individual pieces, so the veining does not repeat on a rigid twelve-inch grid
  • Marble look pairs with warm brass and matte black hardware equally well
  • None of the sealing, etching, or acid-staining worry that real marble brings

Cons

  • Printed veining repeats across the set - shuffle pieces or the pattern becomes obvious
  • The listing states PVC, which is the material to keep furthest from direct heat
  • Faux stone reads best in a low-sheen finish; a high gloss undercuts the illusion
5

Art3d Peel and Stick Backsplash, Stainless Subway Tile, 3 x 6 in, 100-Pack

Art3d · Best for the wall nearest the range, and anywhere heat or splatter lands

A renovation workshop with tools and a workbench

Actual metal rather than printed plastic - the material I would use in the splatter zone, and the only one in this roundup I would put close to a cooktop.

This is the pick that exists for a specific problem rather than a specific look. Everything else in this roundup is a plastic or resin product, and plastic near sustained heat is a losing argument - which matters, because a freestanding range is designed to sit hard against the wall behind it. Real metal removes the question entirely. It also happens to look good: a stainless field behind a range is a deliberate, professional-kitchen move, and it ties to the appliances in a way a printed stainless pattern never does. If the budget only stretches to metal for part of the wall, put it where the cooking happens and run something cheaper along the rest.

$49.99 · View on Amazon

#ad · disclosure · Price as of September 19, 2026

Pros

  • Real metal face, so heat and grease splatter are a wipe rather than a worry
  • Stainless reads as commercial-kitchen intentional rather than as a compromise
  • Matches stainless appliances exactly, which no printed finish quite manages

Cons

  • Shows fingerprints and water spots more than a matte finish does
  • Metal edges are sharp when cut - gloves and a deburring pass are not optional
  • Costs more per square foot than the vinyl and gel options here
6
A warm bathroom styled with towels and plants

Genuine glass mosaic on a self-adhesive backing rather than a printed imitation of one - the pick when the wall has to survive close inspection.

There is a category of buyer who wants peel-and-stick for the installation, not for the price - someone who does not want mortar and a wet saw in their kitchen but does want a wall that holds up when a guest leans in. Real glass is the answer to that, and it is a fundamentally different product from everything else on this page. Small glass mosaic also has a practical advantage that gets overlooked: because the field is broken into dozens of tiny faces on a flexible backing, it hugs a slightly wavy wall far better than a rigid twelve-inch panel does, and slight irregularity reads as handmade texture instead of as a defect.

$66.99 · View on Amazon

#ad · disclosure · Price as of September 19, 2026

Pros

  • Real glass, so the depth, refraction, and color shift are physical rather than printed
  • Small mosaic format is forgiving on walls that are not perfectly flat
  • Wipes clean like real tile, because it is real tile

Cons

  • Heaviest option here - adhesion depends entirely on a properly prepped wall
  • Cutting glass mosaic means nipping individual pieces, which is fiddly
  • Highest cost per square foot in this roundup
7

Art3d Linear Design Tile Peel and Stick Backsplash, 10-Sheet, Beige & White

Art3d · Best for warm kitchens where stark white would fight the cabinets

A modern farmhouse interior in cozy neutrals

A soft beige-and-white linear pattern for the very common kitchen where cream cabinets and a warm counter make a bright white backsplash look blue by comparison.

Bright white is the default recommendation in this category and it is wrong more often than anyone admits. Put a cool white backsplash above a cream cabinet and a warm quartz counter and the white does not read as neutral - it reads faintly blue, and the cabinets suddenly read yellow next to it. That single mismatch is the most common reason a finished backsplash feels off in a way people cannot name. This is the pick for those kitchens: a warm field that lets the cabinets be the color they are, with just enough linear texture that the wall is not a blank.

$34.9914% off

$29.99 · View on Amazon

#ad · disclosure · Price as of September 19, 2026

Pros

  • Warm neutral sits comfortably with cream, oak, and walnut cabinets
  • Linear pattern adds interest without committing to a strong color
  • Sheet format keeps a whole-run refresh to an afternoon

Cons

  • Beige is harder to match sight-unseen than white - order one pack first
  • Printed sheet, so the pattern repeats on a fixed grid
  • A busier pattern makes an obvious seam more obvious, so overlap carefully
8

Art3d 102-Pack Peel and Stick Backsplash on Subway Tile, Black Marble

Art3d · Best for a dark, high-contrast backsplash against pale cabinets

A decorated, cozy living room with a sofa

Black marble-look subway in individual pieces, for the kitchen that wants contrast rather than another quiet white wall.

Contrast is the cheapest way to make a kitchen look designed rather than assembled, and a dark backsplash is the most direct route to it. Against white or pale cabinets a black marble field does something a white backsplash structurally cannot: it draws a clean horizontal band at eye level that makes the cabinets above and the counter below read as intentional bookends. It is also, practically speaking, the most forgiving surface in a kitchen that gets cooked in hard - a splash of tomato sauce disappears on it and announces itself on white.

$49.99 · View on Amazon

#ad · disclosure · Price as of September 19, 2026

Pros

  • Individual pieces, so the veining does not repeat on a twelve-inch grid
  • High contrast makes pale cabinets and warm brass hardware read as deliberate
  • Dark field hides everyday coffee and sauce splatter far better than white

Cons

  • Dark glossy surfaces show dust, water spots, and hard-water residue clearly
  • A dark backsplash absorbs light, so under-cabinet lighting becomes close to mandatory
  • Much harder to reverse taste-wise than white if you tire of it
9

Art3d Smoothing Tool Kit for Peel and Stick Wallpaper

Art3d · Best for the cheap add-on that decides whether any of this sticks

A renovation workshop with tools and a workbench

A felt squeegee and blade kit - the least glamorous item on this page and the one most likely to be the difference between a wall that holds and one that lifts.

Self-adhesive tile does not stick because you placed it, it sticks because you pressed it. The adhesive needs firm, even, whole-surface contact to bond against the wall, and a hand cannot deliver that - hands apply pressure in five discrete spots and leave the rest of the tile floating on trapped air. Those pockets are where every failure starts. A squeegee delivers a continuous pressure front that pushes air ahead of it toward the edge instead of trapping it in the middle. For the price of a coffee it is the highest-leverage thing you can add to this order, and it is the item people skip.

$5.99 · View on Amazon

#ad · disclosure · Price as of September 19, 2026

Pros

  • Felt-edged squeegee applies even pressure without scratching a glossy tile face
  • Costs a fraction of a single pack of tile and gets used on every sheet
  • The blade and trimmer make cuts around outlets far cleaner than scissors

Cons

  • Light-duty plastic tools - treat them as consumable rather than heirloom
  • A felt squeegee lacks the force to seat a thick gel tile; use a seam roller there
  • Blades in budget kits dull quickly, so have spares for a long run

What peel-and-stick backsplash is actually made of

Everything sold under this name gets lumped into one category and priced as if it were one product, but there are four genuinely different materials here and the difference decides where each one belongs on your wall.

  • Gel and resin sheets. The twelve-inch panels with raised tile faces. Art3d publishes the composition for its sheet line as epoxy resin with a PET backing, at 11.8 in square and around 2 mm thick, with ten sheets covering 9.5 sq ft. That thickness is why these throw a real shadow at the joints instead of a printed one.
  • Rigid PVC pieces. The individual three-by-six subway and faux-stone pieces — several listings in this roundup say PVC in the title. Laid piece by piece they give the most convincing joint pattern, and they are the cheapest way to a real running bond. They are also the material to keep furthest from sustained heat.
  • Real glass mosaic. Actual glass on an adhesive backing. Genuine refraction and depth, genuine weight, and by some distance the highest cost per square foot.
  • Aluminum and stainless. A real metal face on an adhesive backing. The only material here I would put close to a cooktop, and the only one that matches stainless appliances exactly rather than approximately.

Price differences across this page track material far more closely than they track brand. A cheap sheet and an expensive sheet of the same resin are usually competing on pattern; a glass or metal option costs more because it is a different substance, not a better version of the same one.

Your wall decides whether this works

I will say this as plainly as I can: the wall matters more than the tile. Adhesive backing is a contact adhesive, and contact adhesive needs a clean, dry, non-porous, reasonably flat surface to grip. Miss any of those and no amount of pressing saves it.

Art3d’s own installation guidance is that tiles go on flat and smooth surfaces, that painted walls should be sanded in advance, and that the surface must be thoroughly dry and clean. Worth knowing: that guidance and the marketing copy on individual product pages do not always agree — one product page lists textured walls among suitable surfaces. When a manufacturer contradicts itself, believe the installation instructions, not the sales page. In my experience anything with a pronounced orange-peel or knockdown texture is a wall you skim, sand, or leave alone.

Practical prep, in the order it matters:

  • Degrease first, then rinse. A kitchen wall carries an invisible film of cooking oil that ordinary spray cleaner smears rather than removes. Use a degreaser or a dilute TSP substitute, then rinse with clean water and let it dry fully — cleaner residue is its own release agent.
  • Scuff glossy or flat paint. Semi-gloss and satin are close to ideal. High gloss is too slick to grip well; flat and matte paints are chalky and hand you a layer that comes off with the tile. A light pass with fine sandpaper fixes both.
  • Give new paint time. Fresh paint keeps curing for weeks after it stops feeling wet. Stick to it too early and you are gluing to a surface that is still moving.
  • Test one piece for a week. Put a single tile low in a corner, leave it several days, then try to lift a corner. It costs one tile and it tells you what an entire wall will do.

None of this is exotic — it is the same preparation logic behind every reversible upgrade in my DIY home decor guide. The surface underneath does most of the work.

Behind the range: the one place to be careful

This is the question people ask most and it deserves a straight answer rather than a shrug. Start with a fact from the appliance side: GE Appliances’ published clearance requirements for a freestanding range allow 0 in spacing to cabinets below the cooktop and at the back of the range, while requiring 30 in between the surface units and the bottom of an unprotected wood or metal cabinet above (24 in when that cabinet bottom is protected by at least 1/4 in flame-retardant millboard covered with No. 28 MSG sheet metal or better), 6 in to a side wall on each side, and 18 in to cabinets above the counter.

Read that carefully and the issue becomes obvious. The range is permitted to sit flush against the wall behind it, which means whatever is on that wall is the material closest to the heat — and the appliance standard has nothing to say about it, because it assumes a normal wall finish.

On the material side, manufacturers of gel and resin tile describe their sheets as resistant to the heat of stovetops, and Art3d says exactly that on the product page linked above. I take that at face value for a splash-zone wall a reasonable distance from the burners. I am more cautious about rigid PVC pieces close to sustained heat: the plastics-pipe industry rates rigid PVC for a maximum operating temperature of 140°F, with performance de-rated for anything above 73.4°F. Backsplash tile is not pipe and it is not under pressure, but it is the same family of polymer, and that is the honest reason I would not put printed PVC directly behind a burner.

What I would actually do, and what I tell clients:

  • Put metal in the hot zone. Run the stainless option on the section of wall behind and immediately beside the range, and use whatever you like across the rest of the run. Nobody reads a stainless field behind a cooktop as a compromise.
  • Or keep a stainless splash panel. If the range came with a back guard, or the wall already has a metal panel, leave it and begin your tile above it.
  • Do not assume a fire rating. None of the listings featured here publishes an ASTM E84 flame-spread class, so treat the absence of a stated rating as exactly that — absent. If a rating matters to you, ask the seller before ordering.
  • Follow the appliance manual, not a blog. Your specific range came with clearance instructions. Those numbers are the ones that govern your kitchen.

How much to buy, and how to measure it

The most common ordering mistake in this category is not buying the wrong tile, it is buying the wrong quantity — because listings quote coverage in sheets, in pieces, and in square feet, sometimes all three, and the numbers are not comparable.

  1. Measure the field in square feet. Measure the run of counter and multiply by the height from the countertop to the bottom of the upper cabinets. A standard gap is roughly 18 in, which lines up with the 18 in minimum GE specifies to cabinets above the counter, but measure yours rather than assuming.
  2. Subtract only large openings. Take out a window or a big vent hood, but leave outlets and switches in your total. You cut around them and the offcuts are rarely reusable.
  3. Convert the listing to square feet. Art3d states that ten of its 11.8 in sheets cover 9.5 sq ft — roughly 0.95 sq ft per sheet. A 3 in by 6 in piece is 0.125 sq ft, so a 100-piece pack is about 12.5 sq ft before waste. Sheet sizes vary between brands, so run this math against the listing in front of you.
  4. Add 10 to 15 percent. Cuts, mistakes, an outlet that lands badly, and a few spare pieces for a repair years from now when the exact pattern is discontinued.
  5. Buy it all in one order. Print runs and gloss levels vary between batches. Two orders placed a month apart can arrive noticeably different, and on a wall that difference is permanent.

Renting? Read this before you stick anything

Peel-and-stick backsplash is marketed hard at renters and it is genuinely one of the better options available to them — but “removable” is a claim about the product, not a promise about your wall. What actually comes off cleanly depends on what is underneath. Well-cured semi-gloss paint usually releases fine. Flat or matte paint, or paint that had not fully cured when the tile went up, can bond hard enough that the tile takes a layer of paint with it.

Three things worth doing before you commit a whole wall:

  • Read the lease. Some landlords count any adhesive wall treatment as an alteration regardless of whether it removes cleanly. A one-line email now is cheaper than a deposit later.
  • Test in an inconspicuous spot. One tile, low in a corner, left for a week, then removed. Warming the adhesive gently with a hair dryer and pulling slowly at a shallow angle is the technique that gives the best result.
  • Keep the offcuts. If you ever need to patch a spot where paint lifted, matching leftovers are worth far more than the few dollars they cost.

If you are furnishing a rental more broadly, the same undo-it-on-move-out logic runs through my renter-friendly decor ideas — and a backsplash sits right in the sweet spot of high visual payoff for low, reversible cost.

Frequently asked questions

Does peel-and-stick backsplash come off without damaging the wall?

Usually, but it depends on the paint underneath rather than on the tile. Well-cured semi-gloss or satin paint generally releases cleanly. Flat and matte paints are chalky and can come away with the adhesive, and paint that had not fully cured when the tile went up can bond hard enough to lift in sheets. Test one tile in a hidden spot for a week before committing to a whole wall, and when you do remove it, warm the adhesive gently with a hair dryer and pull slowly at a shallow angle rather than straight out.

Can you put peel-and-stick backsplash behind a stove?

With care, and with attention to material. A freestanding range is permitted to sit flush against the wall behind it — GE Appliances specifies 0 in of spacing at the back of the range — so the wall finish there is the material closest to the heat. Gel and resin sheets are described by their makers as resistant to stovetop heat, and I accept that for a splash-zone wall a sensible distance from the burners. I would not put printed rigid PVC directly behind a burner: the plastics-pipe industry rates rigid PVC for a maximum operating temperature of 140°F. The safest approach is to run a real metal tile on the section behind and beside the range and use whatever you like elsewhere — and to follow the clearance instructions that came with your specific range.

Will peel-and-stick tile stick to a textured wall?

Poorly, in most cases. Art3d’s installation guidance calls for flat and smooth surfaces and says painted walls should be sanded in advance, though some of its individual product pages list textured walls as suitable — when a manufacturer contradicts itself, follow the installation instructions. Adhesive only grips the high points of a textured wall, which means a fraction of the contact area it needs. A light orange peel can sometimes work with a thicker gel tile that bridges the texture; a pronounced knockdown or skip-trowel finish needs skimming and sanding first.

How long does a peel-and-stick backsplash last?

Nobody publishes a credible lifespan figure and I am not going to invent one. What I can tell you is what determines it: wall prep, how much direct heat and steam the surface takes, and the material. A well-prepped semi-gloss wall in a normal kitchen holds for years, and glass and metal outlast printed vinyl because their faces do not fade or scuff. Failures almost always start at an edge or a seam rather than in the middle of a tile, which is why pressing the perimeter properly at install time is the best thing you can do for longevity.

Can I use peel-and-stick tile in a bathroom or a shower?

A bathroom wall, yes. A shower, no. Art3d states its sheets handle the humidity of bathrooms but explicitly says they cannot be used in a shower, and that distinction is the right one — humid air is very different from standing water running down a surface and finding every seam. Behind a bathroom sink, around a vanity, or on a powder-room accent wall it works exactly as it does in a kitchen. Inside a wet area it will fail, and the failure will be behind the tile where you cannot see it.

How many sheets or pieces do I need?

Measure the run of counter, multiply by the height from the countertop to the bottom of the upper cabinets, and convert the listing to the same units. Art3d states that ten of its 11.8 in sheets cover 9.5 sq ft, so about 0.95 sq ft per sheet; a 3 in by 6 in piece is 0.125 sq ft, so a 100-piece pack is roughly 12.5 sq ft before waste. Add 10 to 15 percent for cuts, outlets, and a few spares — and buy the whole quantity in one order, because gloss levels and print runs vary between batches.

Do you need to grout peel-and-stick tile?

No. The grout lines on gel sheets and printed tile are part of the product, either molded into the surface or printed on it, and adding real grout on top defeats the point of a dry installation. If you lay individual pieces, the small consistent gaps you leave between them read as the grout line — which is one more reason to work off a level pencil line rather than by eye, because uneven gaps are far more noticeable than a slightly off color.

Does peel-and-stick backsplash look cheap up close?

Some of it does, and the reason is almost always the same two things: printed grout lines that repeat on a fixed grid, and a flat surface with no shadow at the joints. The products that hold up to close inspection are the ones that solve those — individual pieces laid in a real running bond so the pattern does not repeat, thicker gel tiles with genuinely recessed joints, and real glass or metal, which are not imitating a material at all. A backsplash is judged from about three feet away, and at that distance depth and pattern repetition matter far more than price.

Ready to make your space feel like home?

Browse the roundups I'd actually hand a client — honest picks, real trade-offs, and the one to buy first.